Design Challenge: Research, define, develop and manufacture ten identical houseware products to sell at the annual Winter Market and earn at least one-hundred dollars.
Design Constraints: Design a home-good on a one-hundred dollar budget, manufacture ten of the same product, make back at least one-hundred dollars. Must incorporate sustainability.
Final Deliverables: Ten identical products
Time frame: 4 months
Materials: Reclaimed upholstery fabric, repurposed binder plastic, thread, 3D printed handles, snaps
Teammate: Ben Drake


Develop
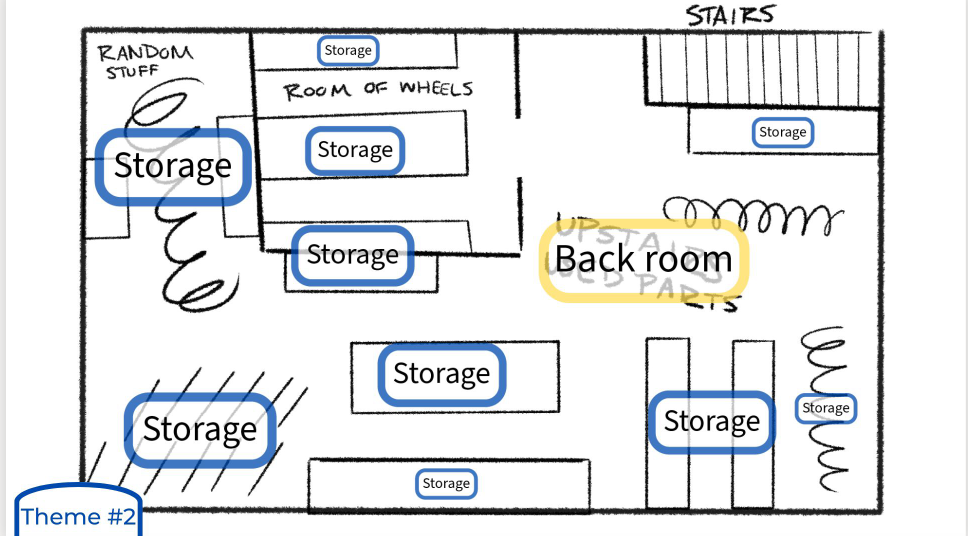
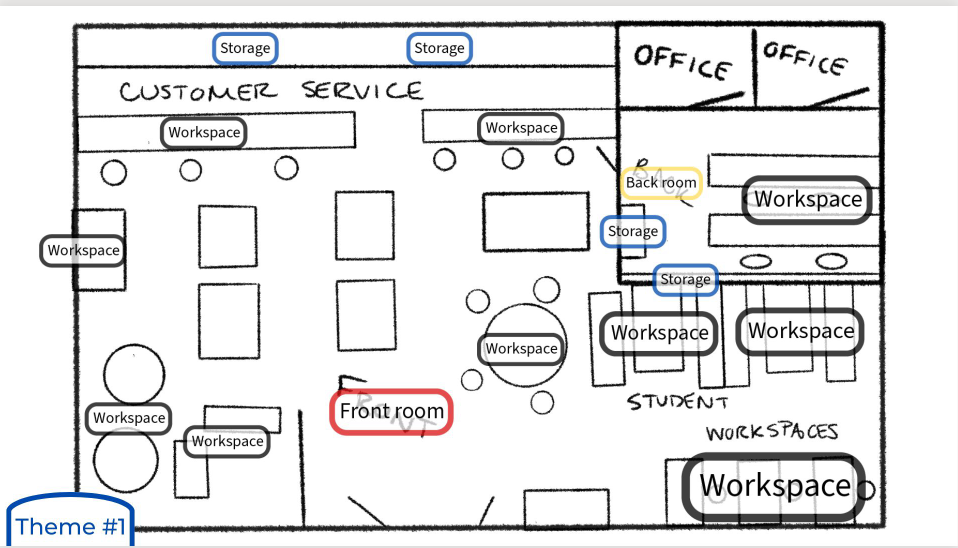
Another group provided us research from the previous part of the assignment. Using insights they gathered from researching repair and storage at repair shops.
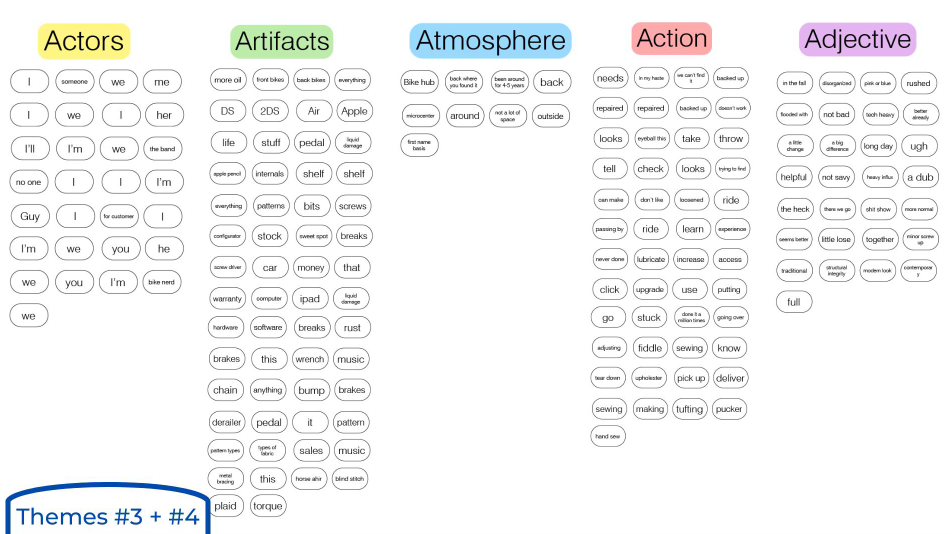
Insights
How might design supplement and support individual repair?
How might design advocate that repair is a positive experience?
How might we leverage design to incorporate storage into workspaces?
Concept Development
Giant group brainstorm using the three insights from the research. Had to consider housewares, materials and processes, and sustainability.


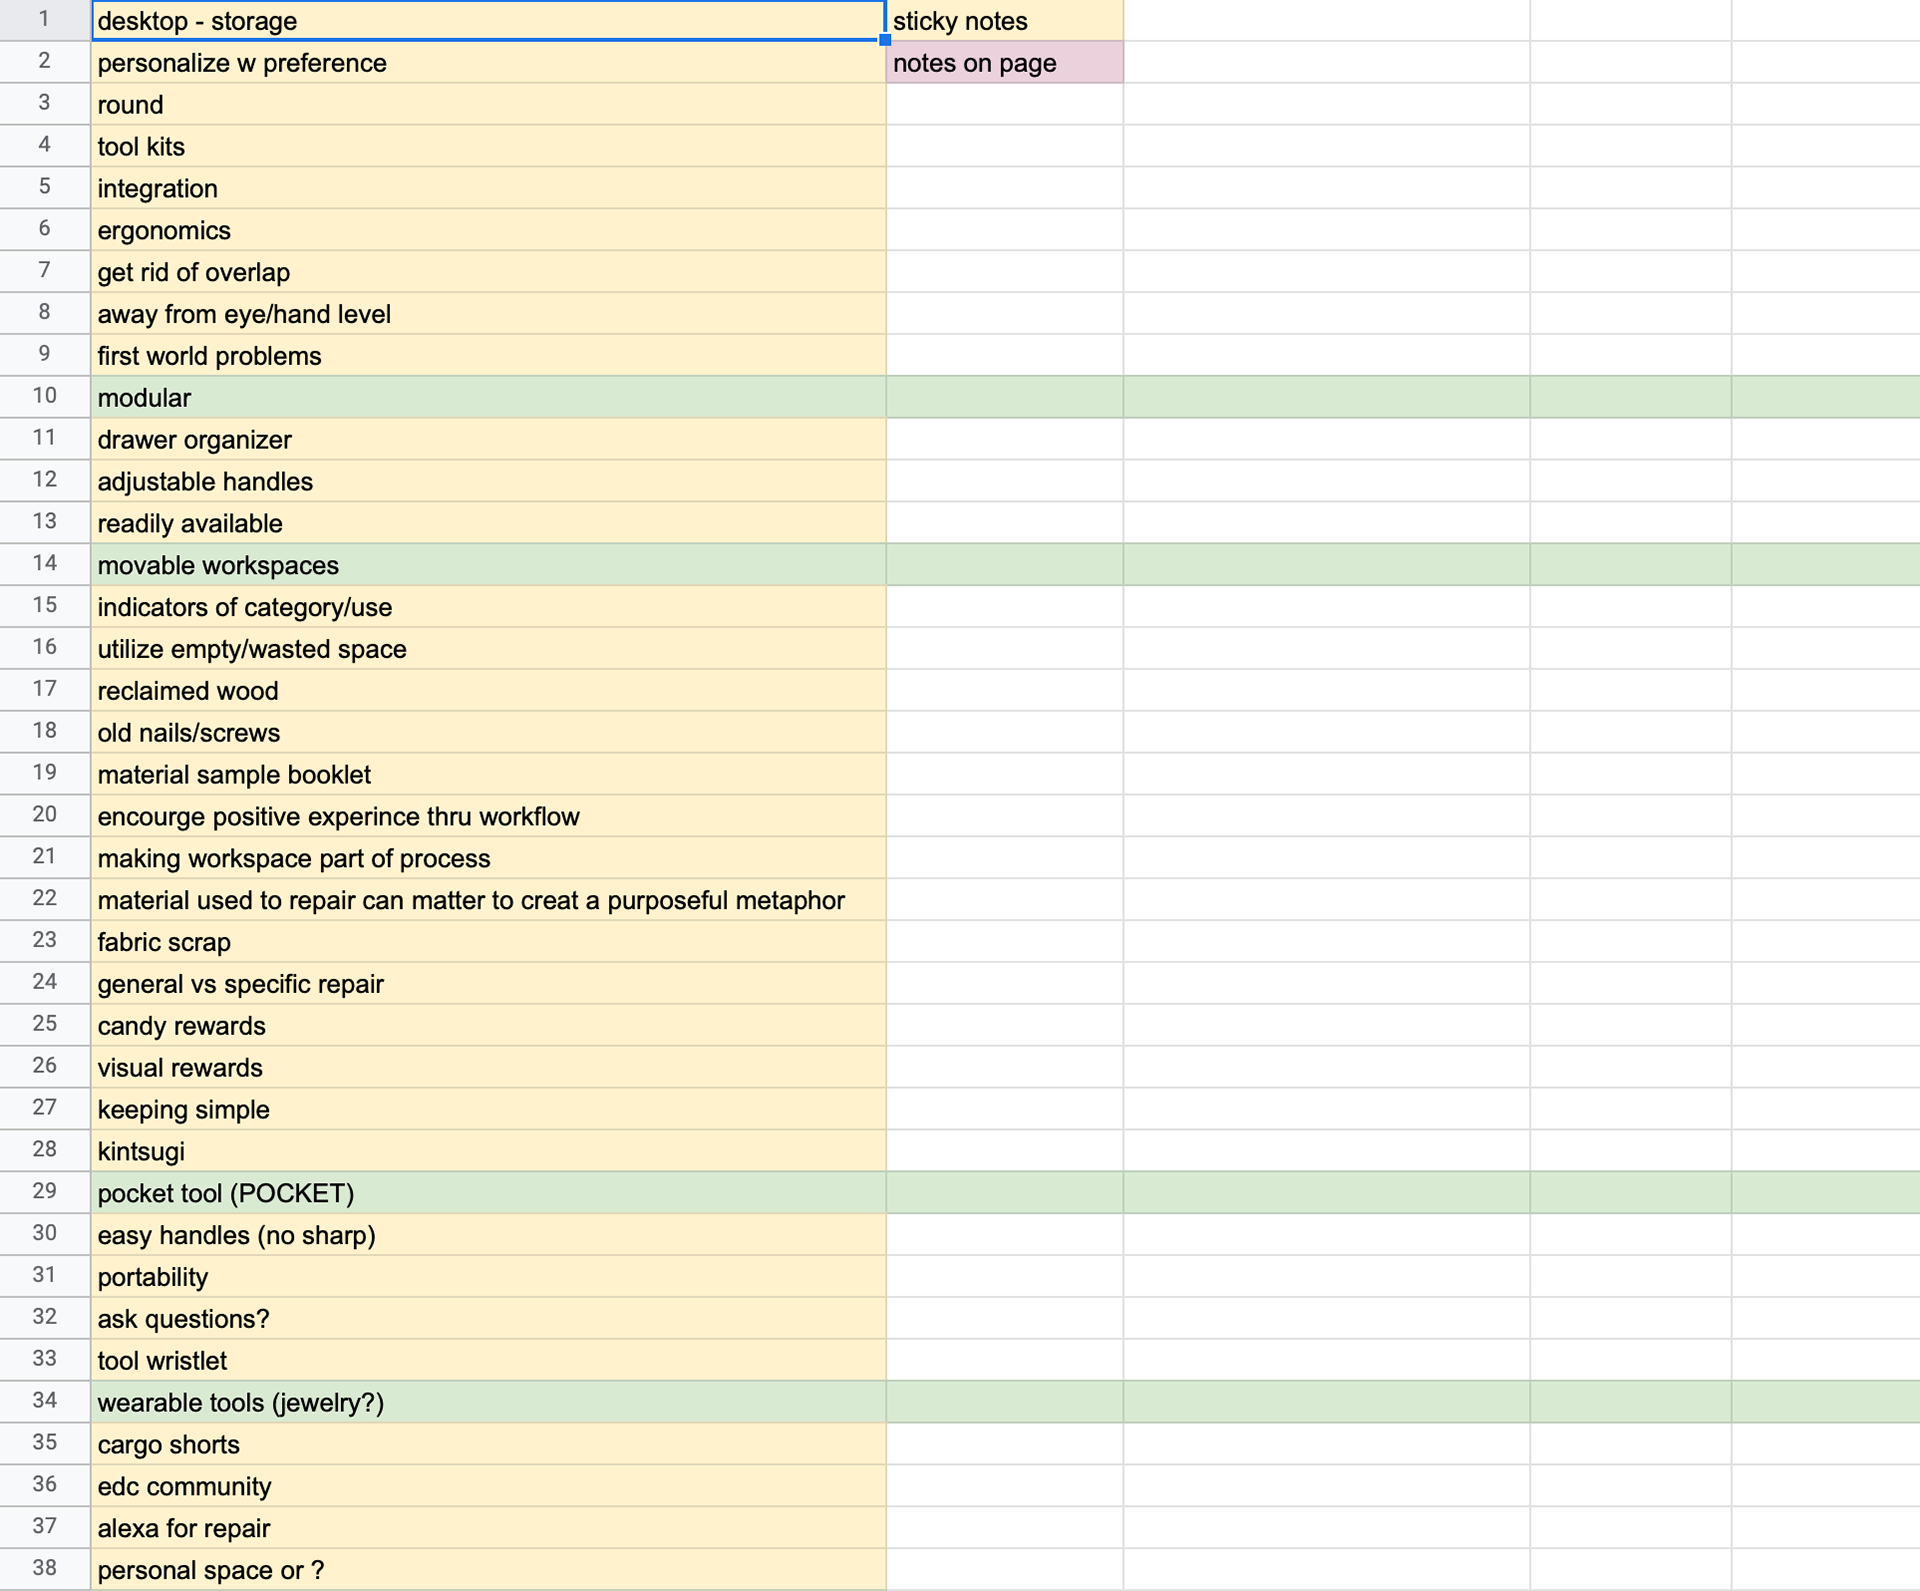
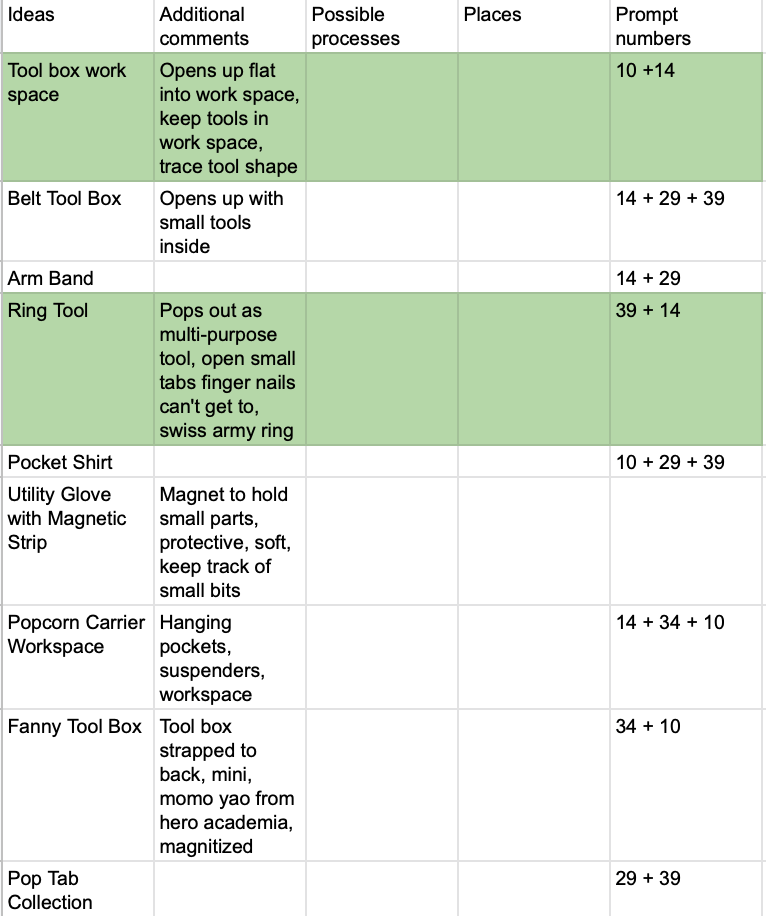
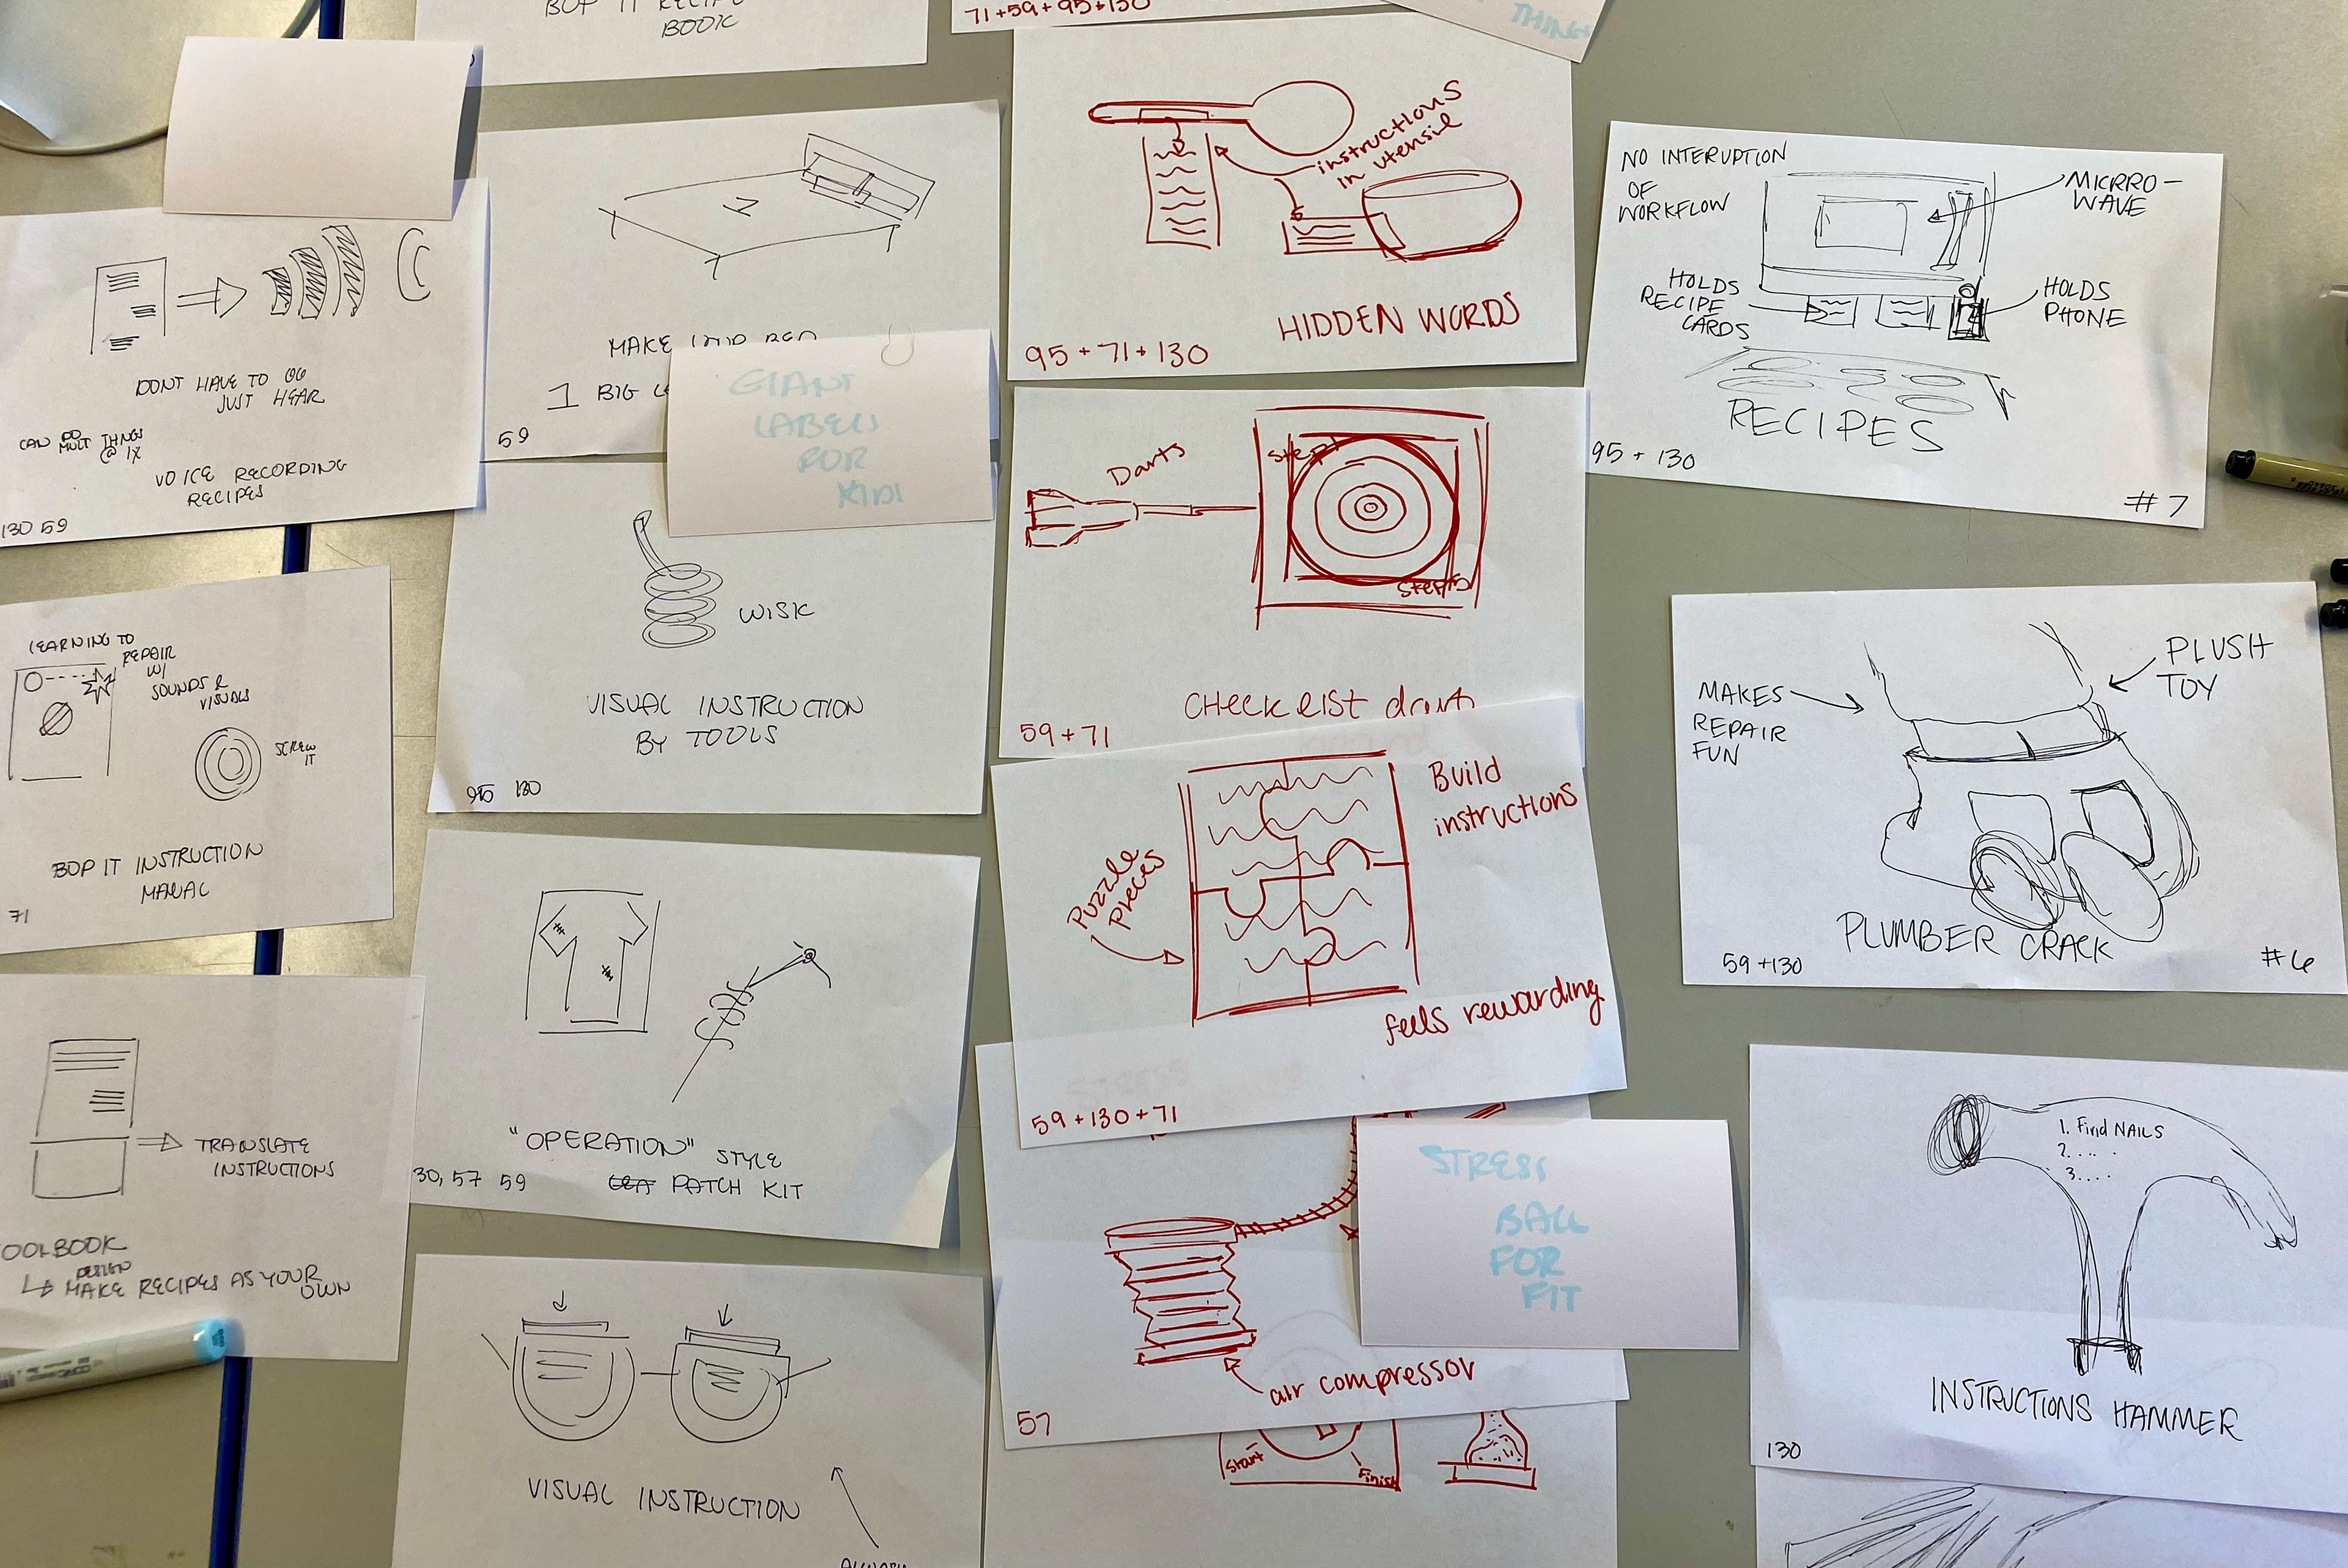
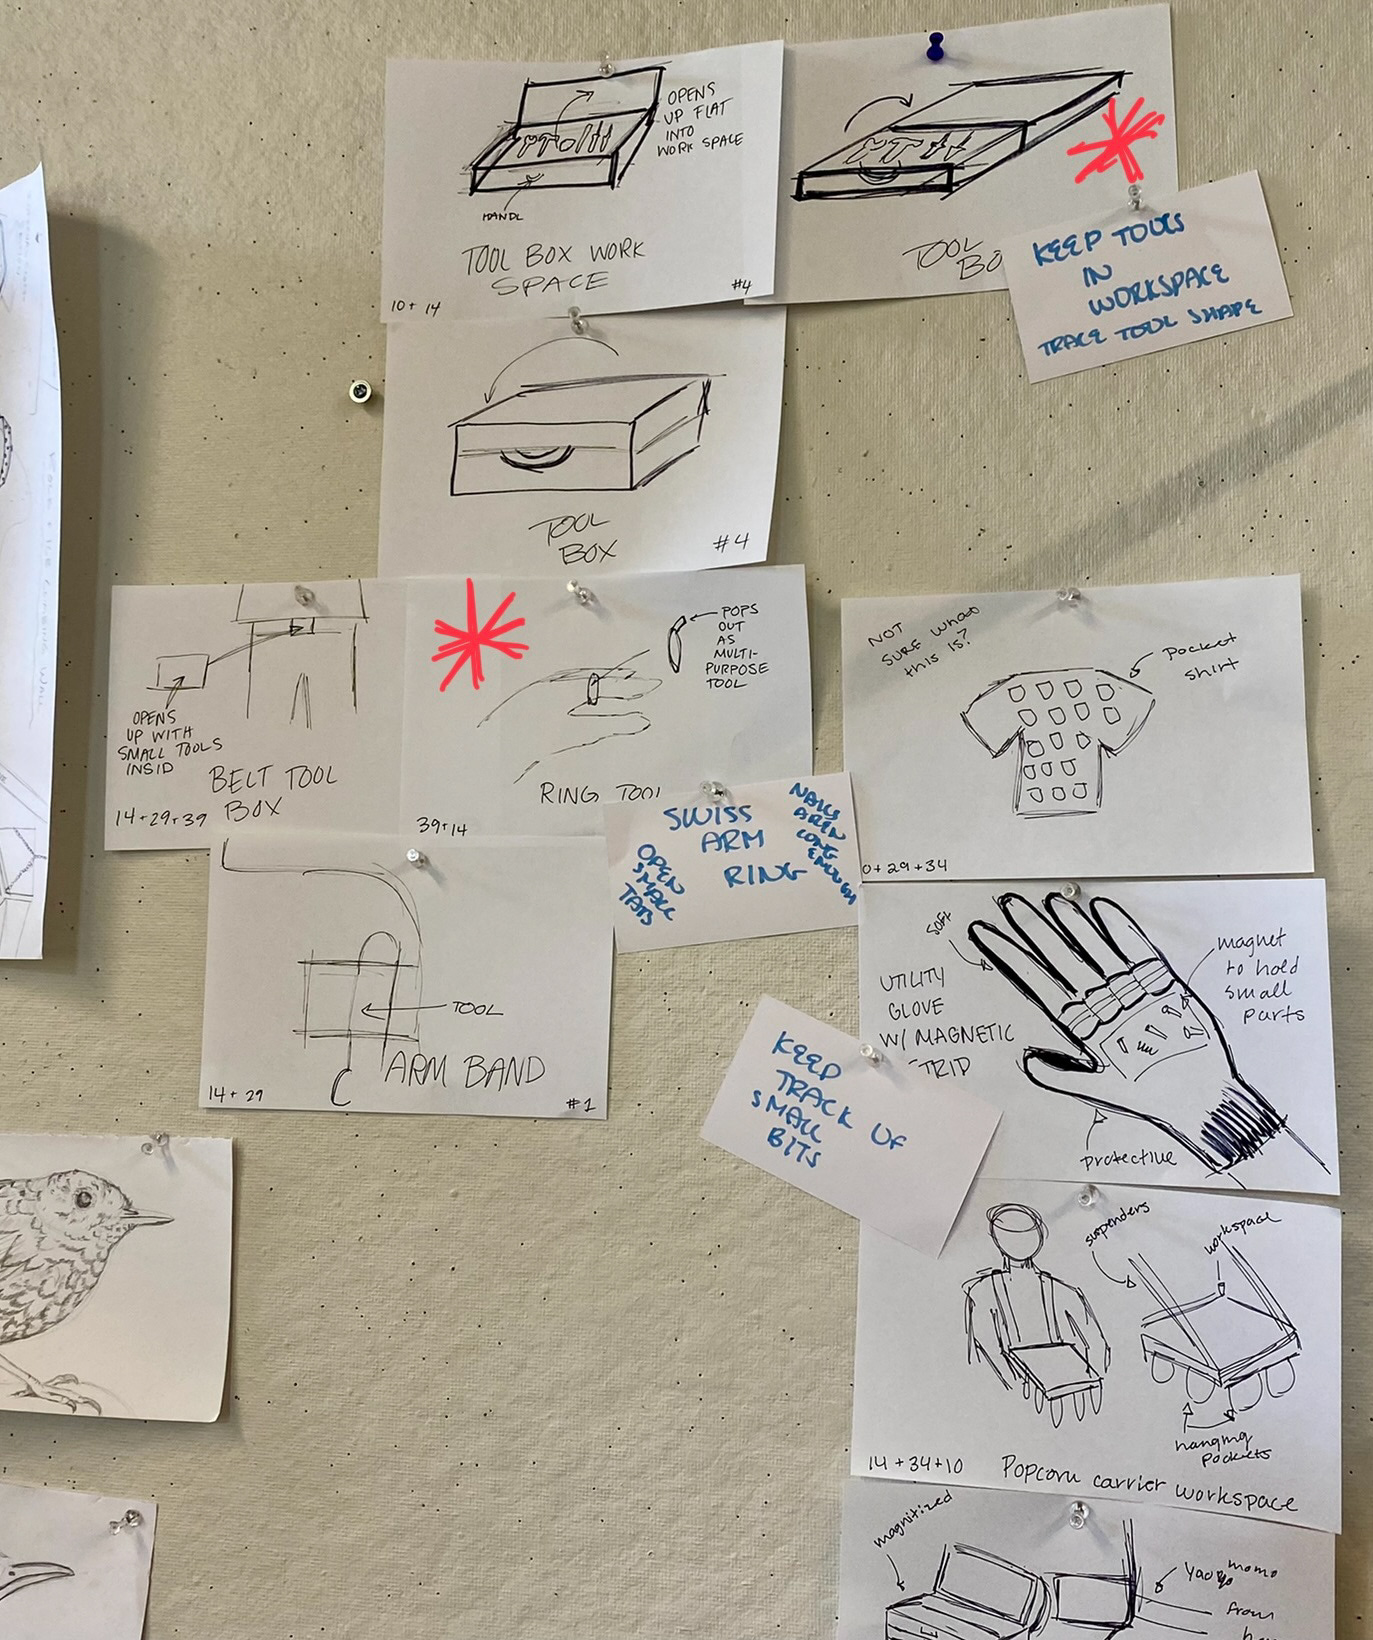
We numbered every idea and then organized them into a spreadsheet. Turned the numbers into prompts to help us in the sketch brainstorm.
In a four person group, we generated forty sketches in one hour based on the ideas my partner and I thought most interesting.


Refined Concept Sketches
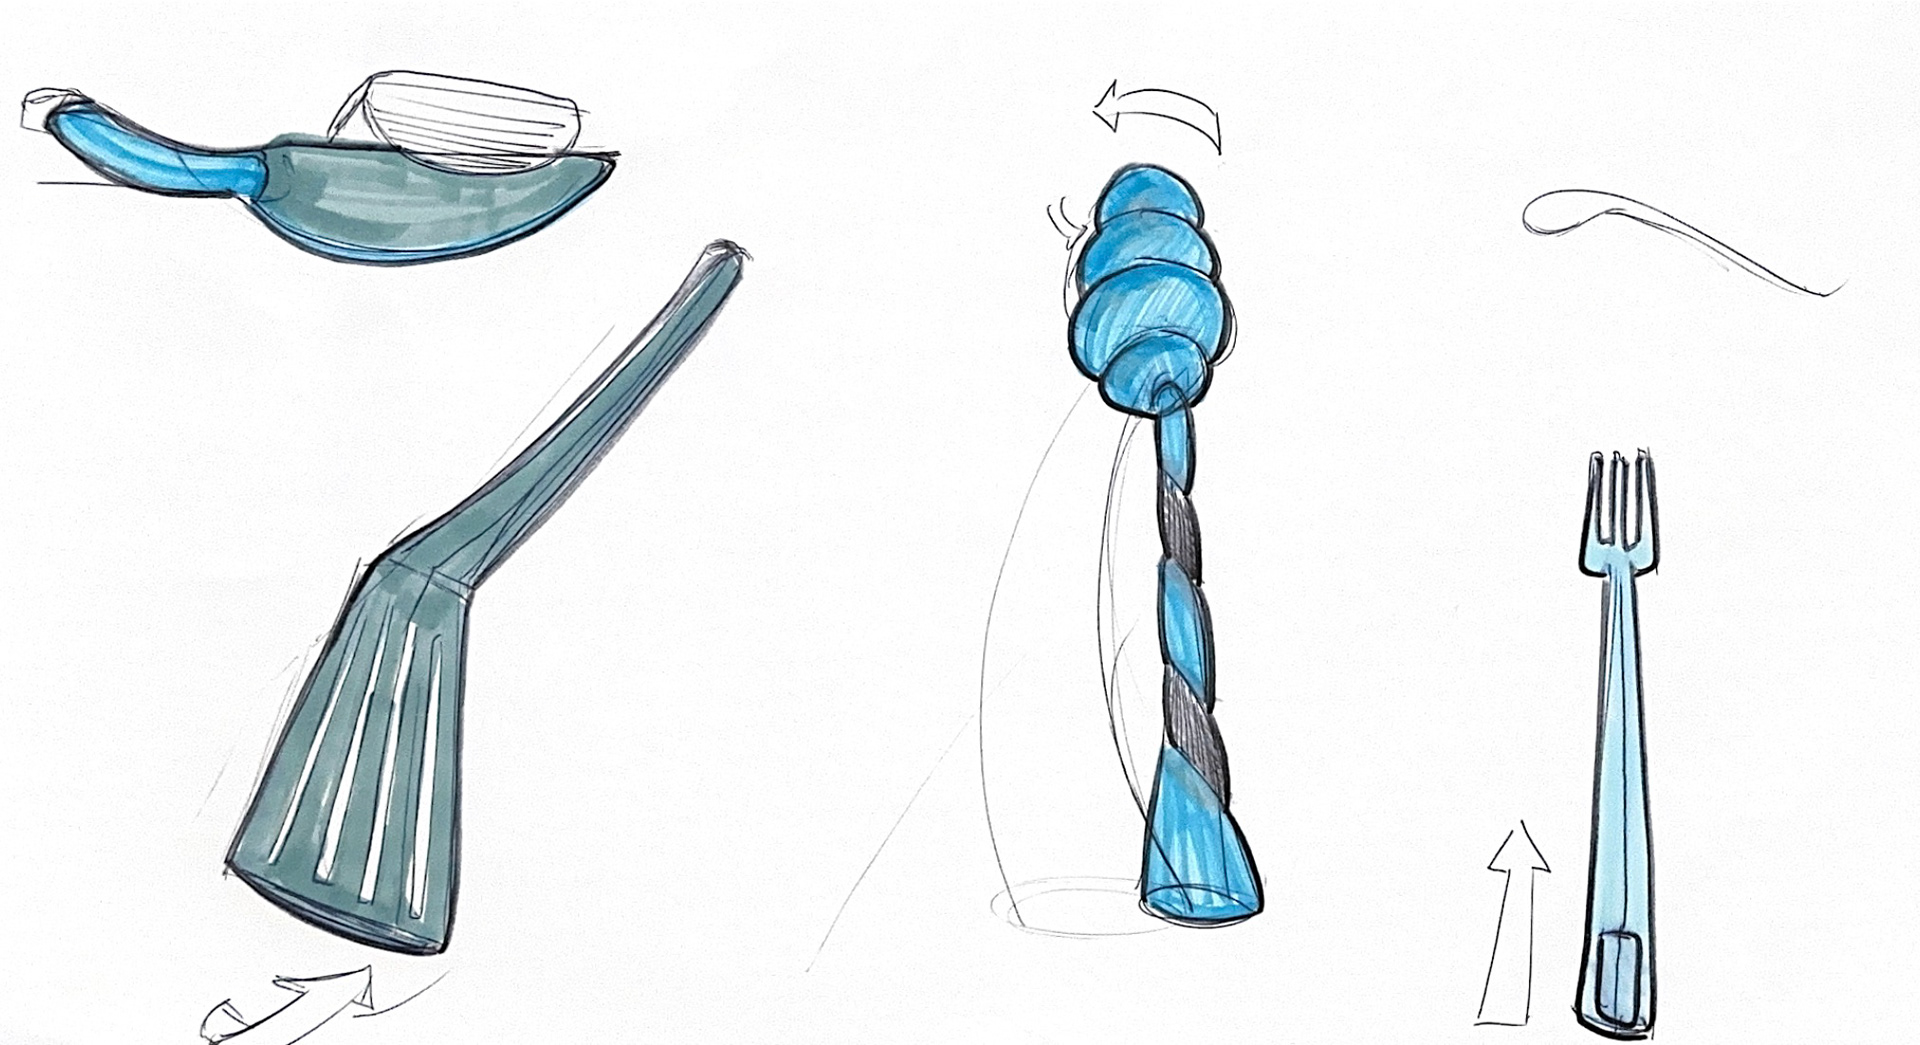
Visual Aiding Kitchen Tools
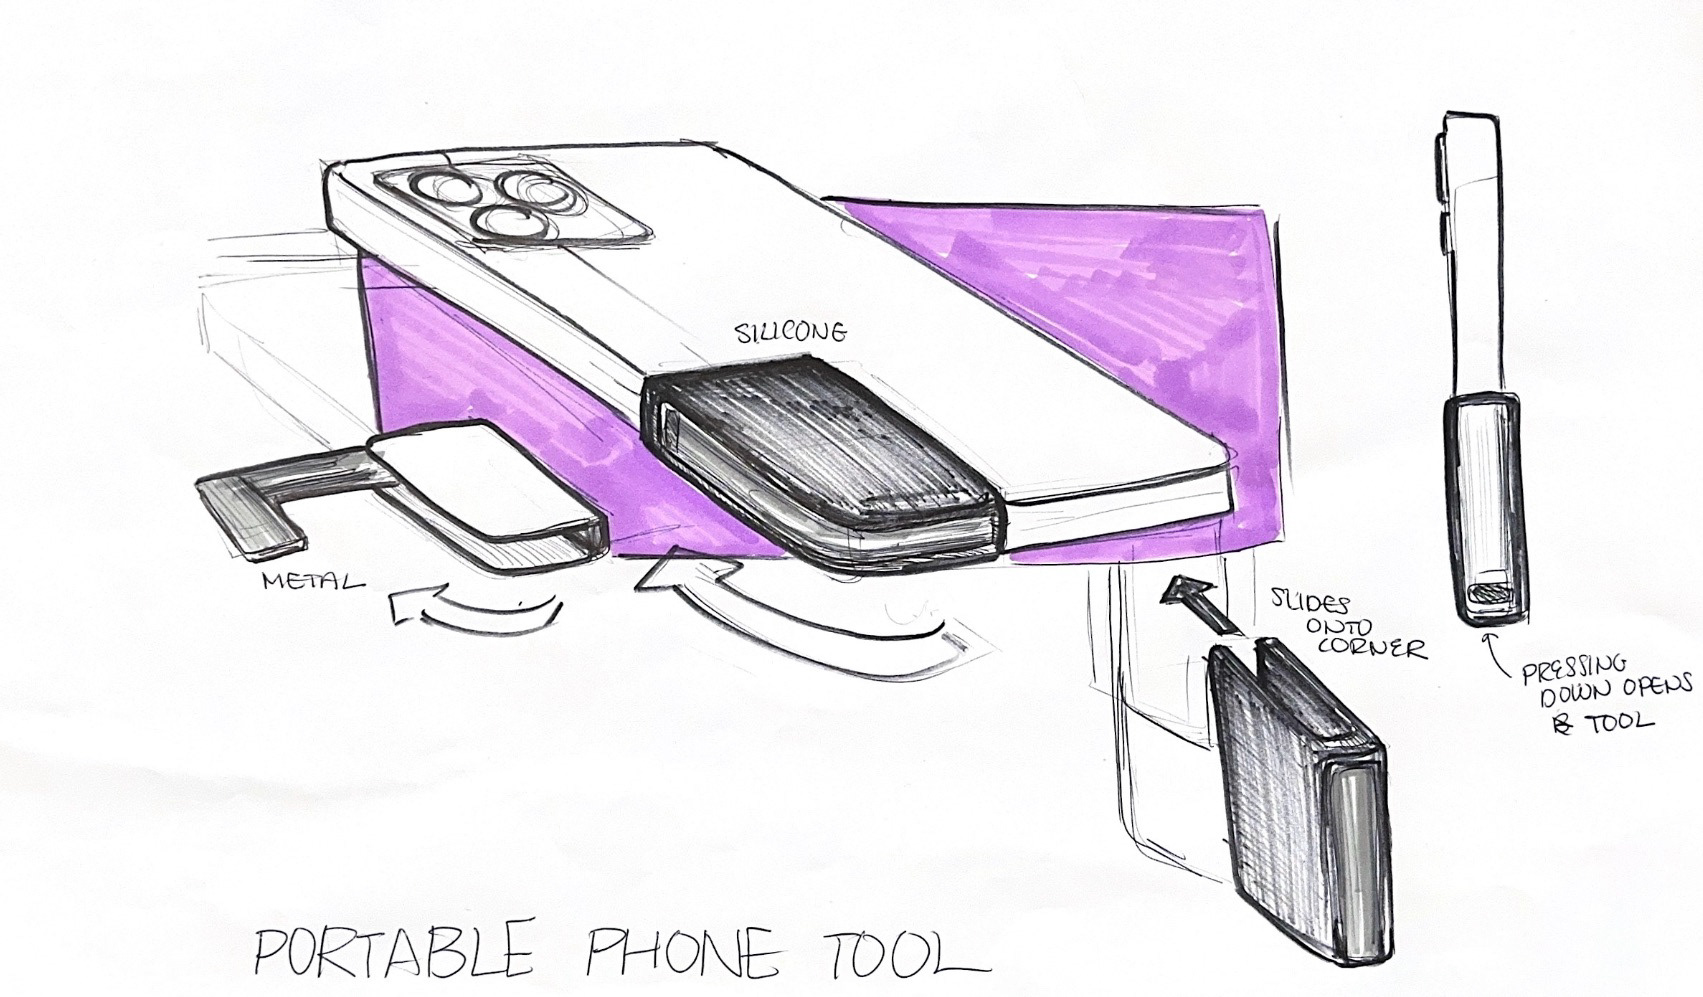
Portable Phone Tool

All in One Measuring Cup
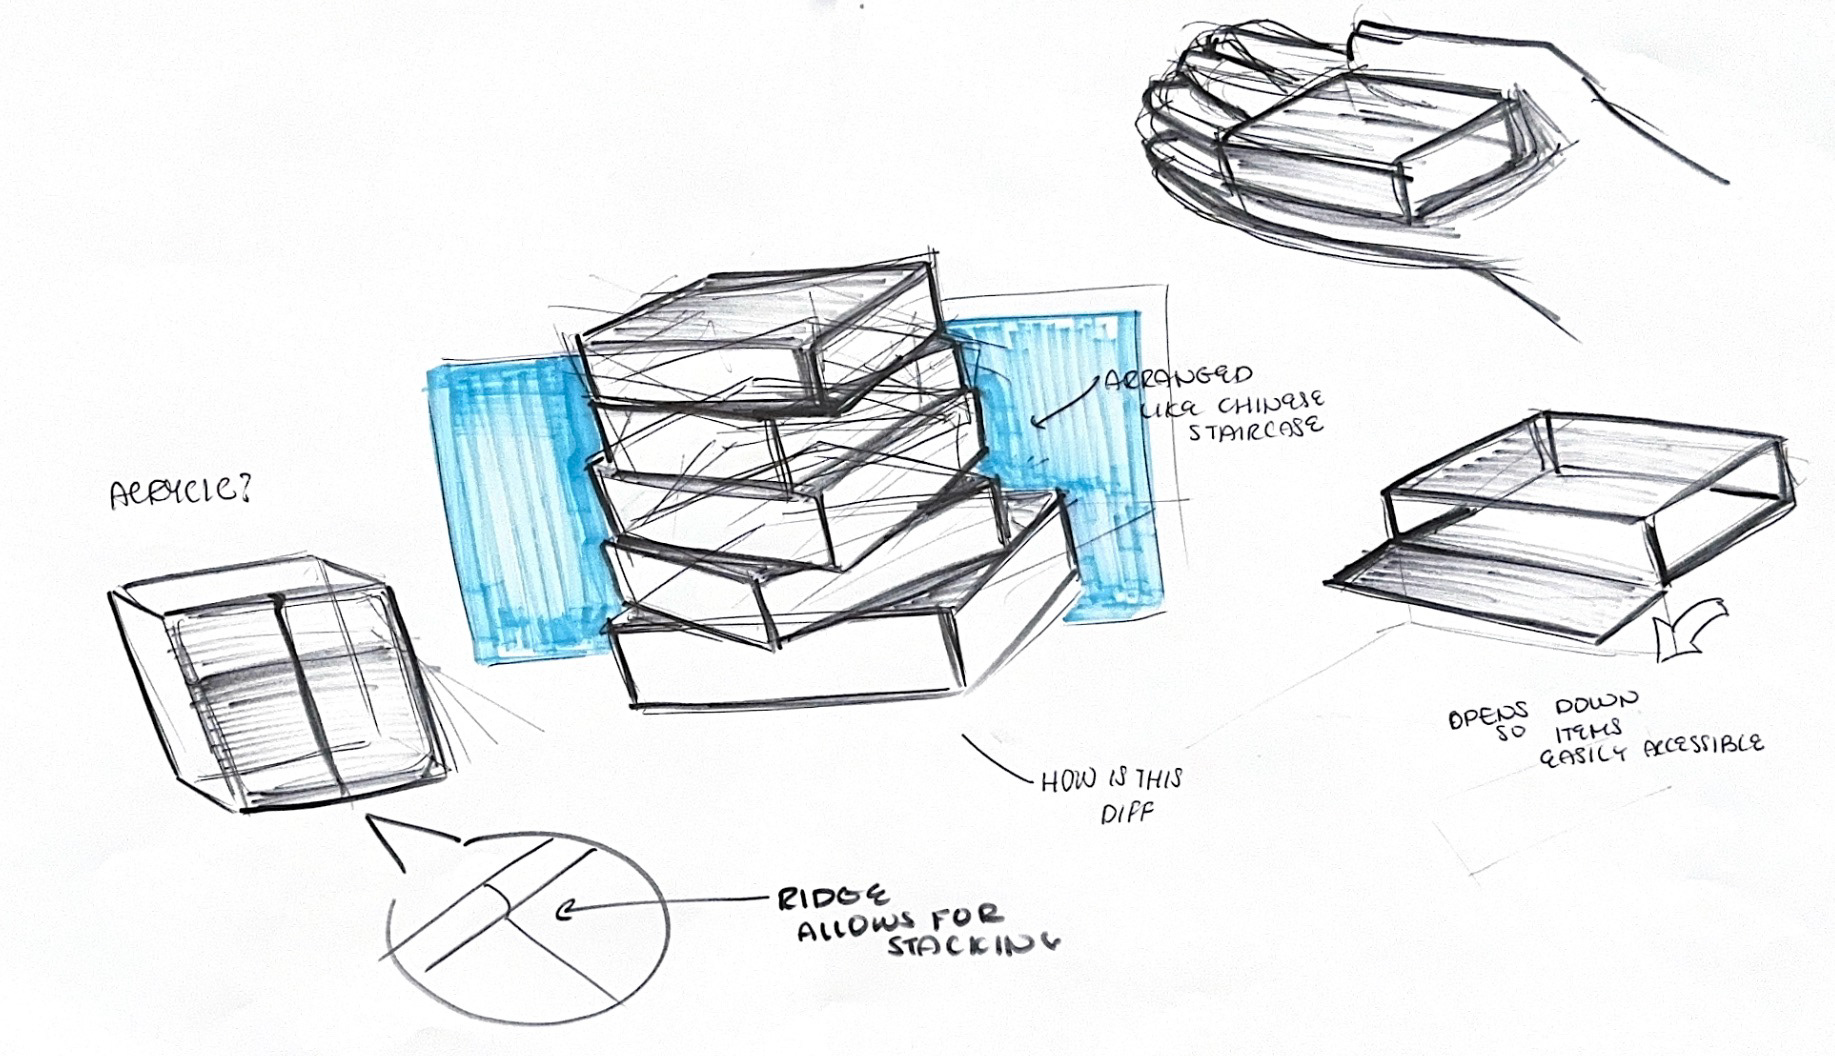
Modular Storage
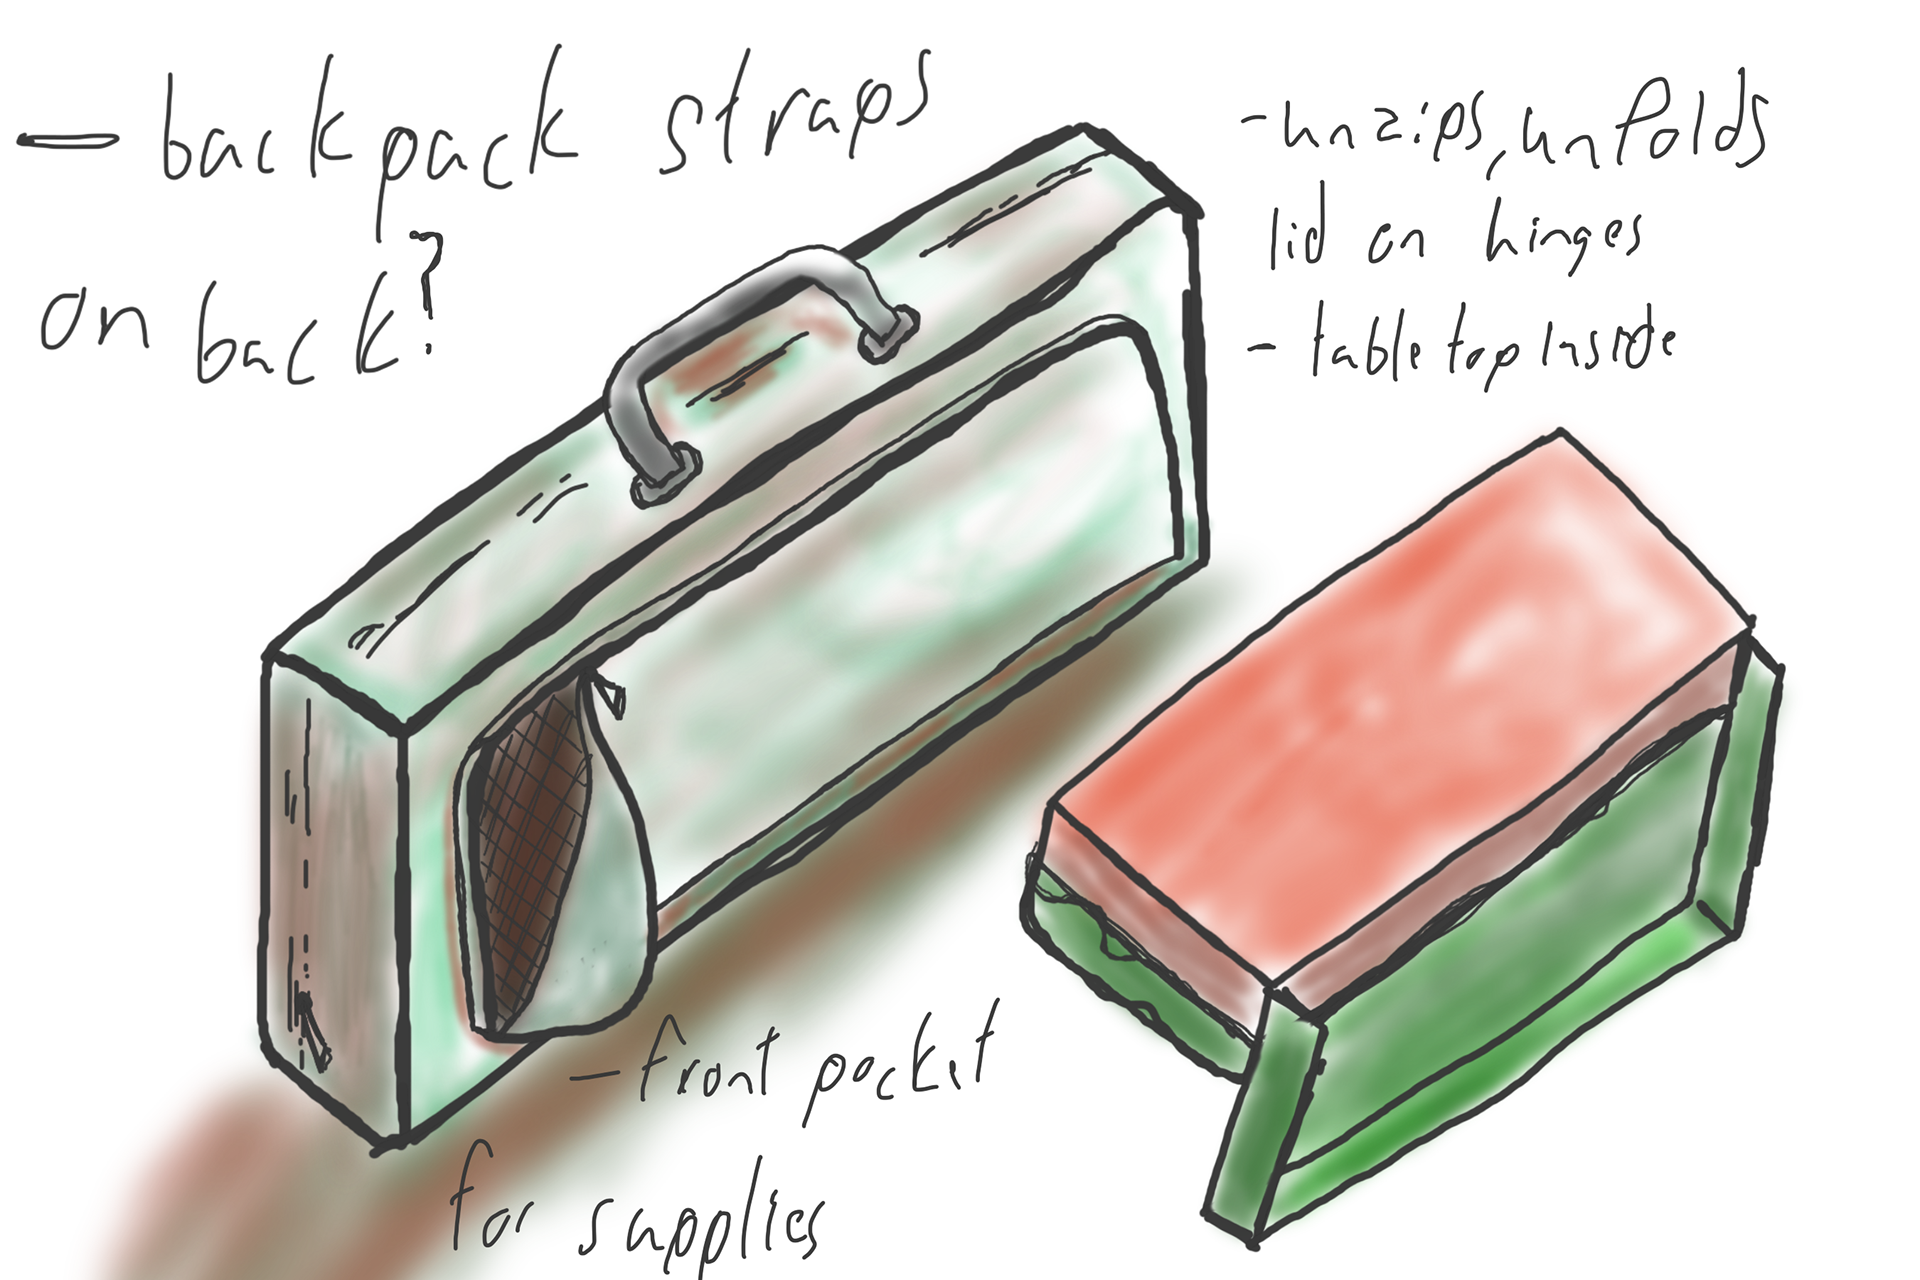
Portable Desk

Slice Bag
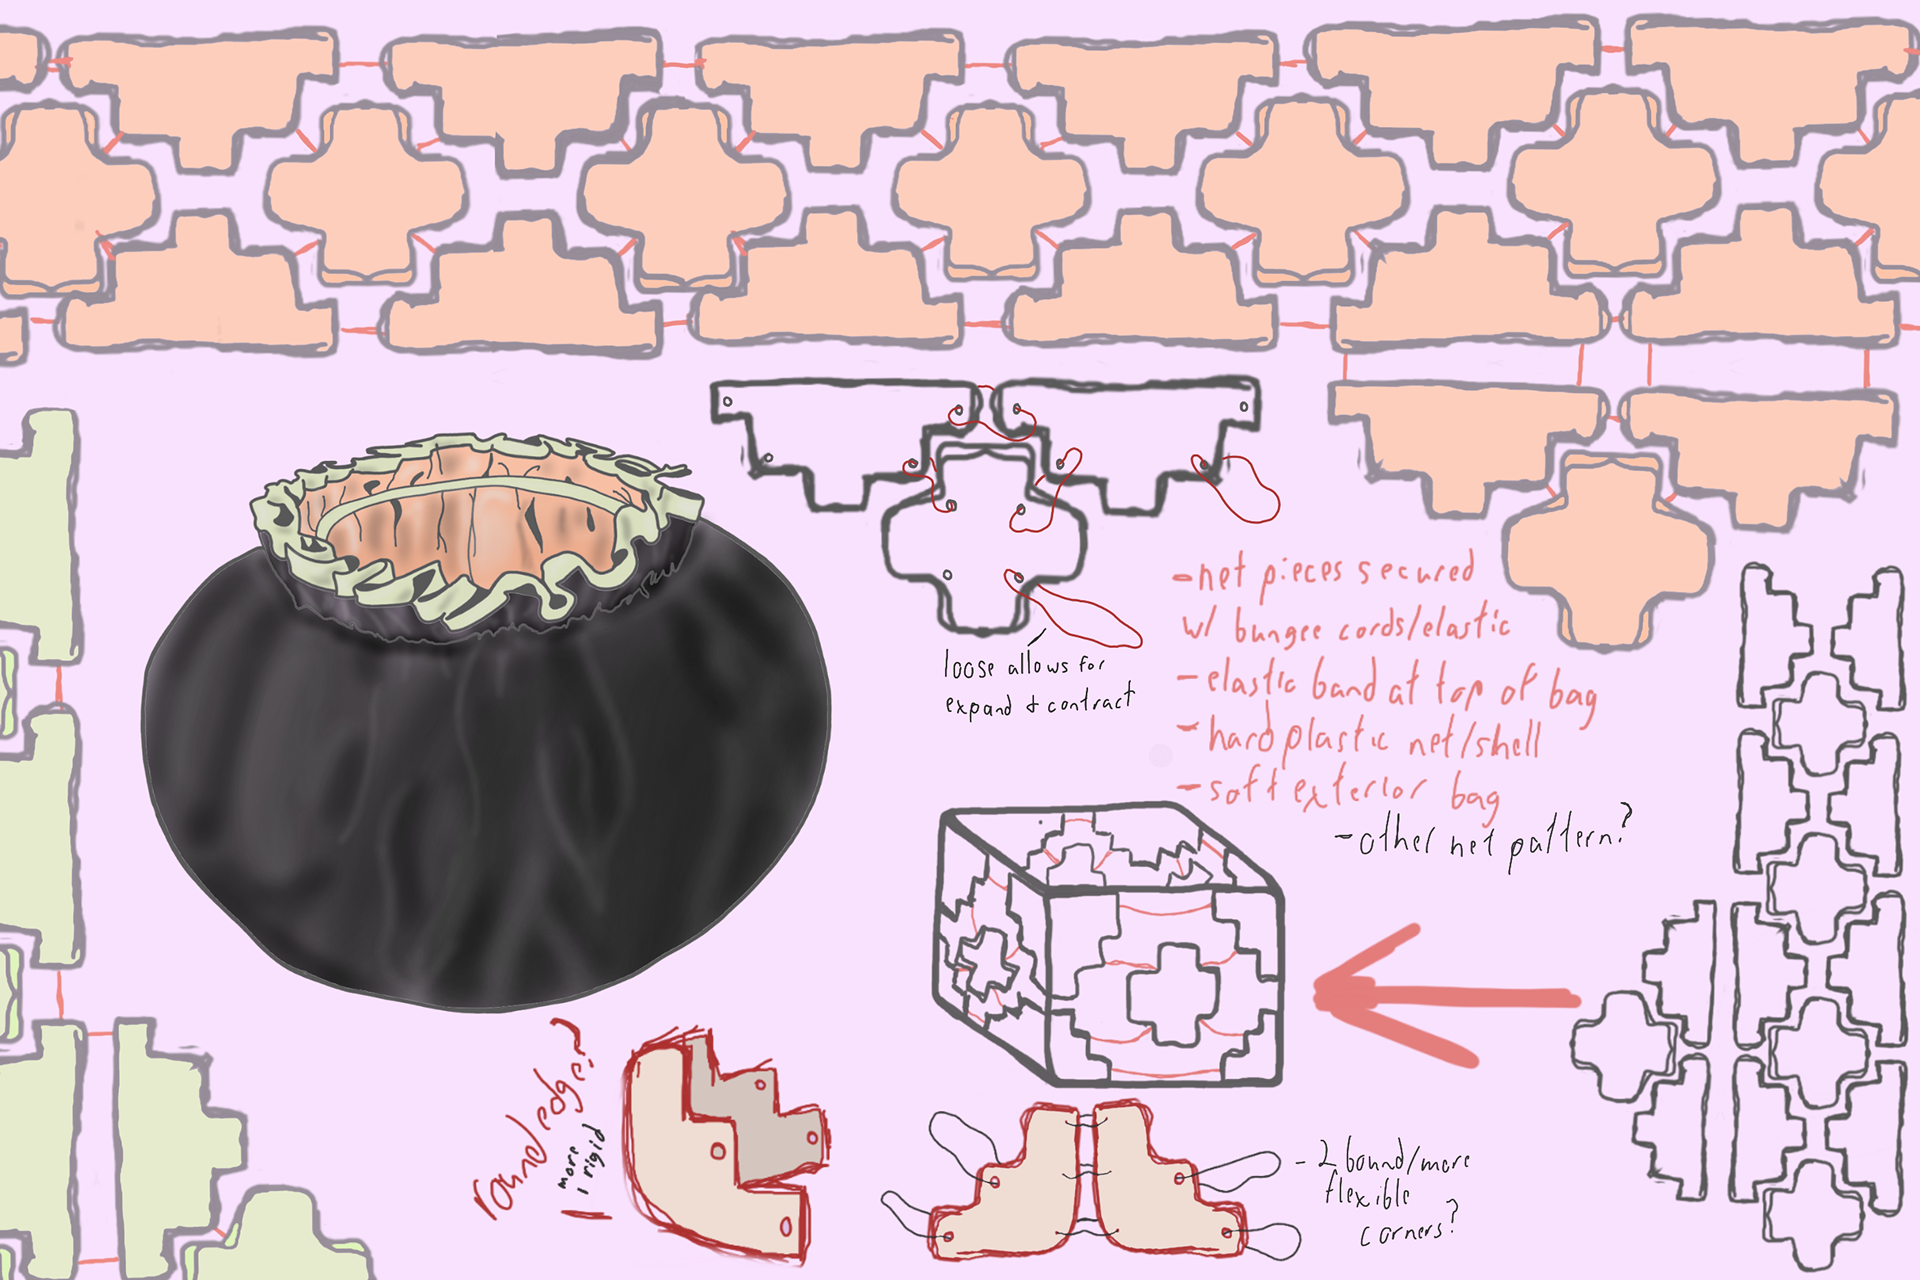
Expandable Storage
The slice bag was one of the top concepts. The idea behind it was that the user could divide their stuff into different parts of the bag. Depending on what the user needed at a certain time he/she could bring one or multiple slices with them. The collapsable storage was our other top concept was expandable storage. It would expand and contract depending to its contents.
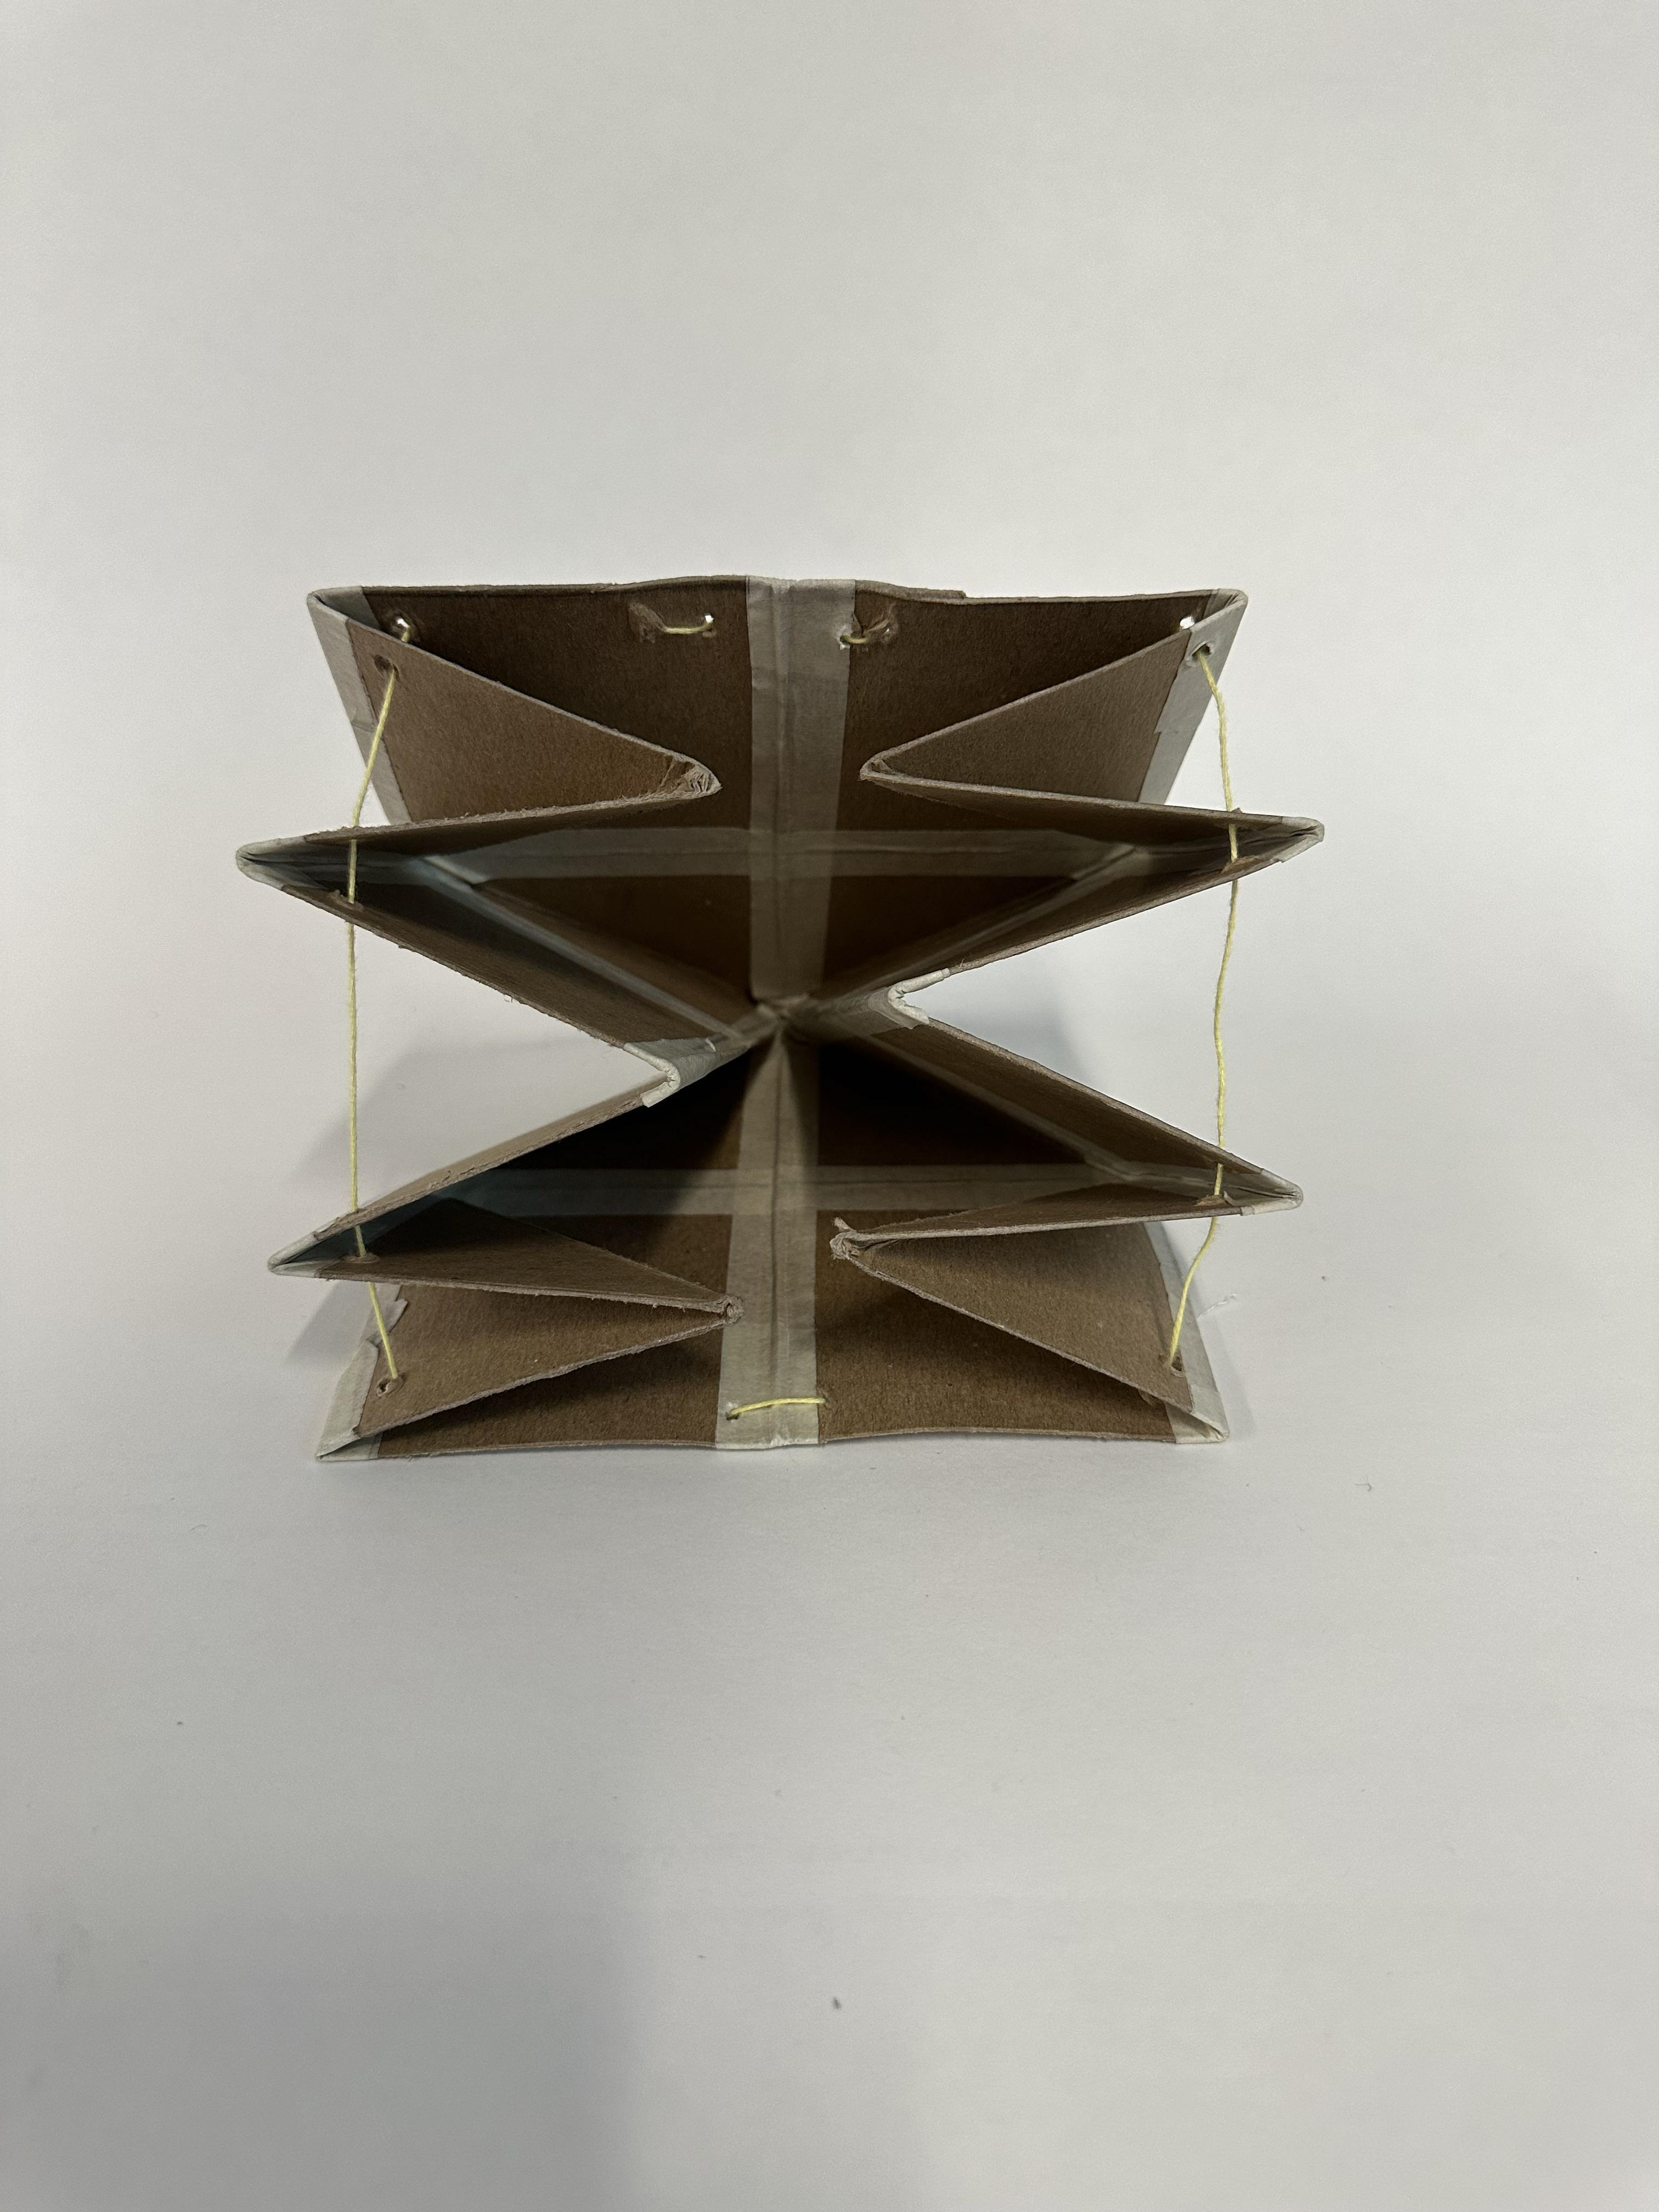
Prototyping Initial Ideas
The prototype on the left is a mock up of the slice bag and made of paper and tape. The prototype on the right uses chipboard and string and tries to capture the collapsable storage.

Final Concept Iterations
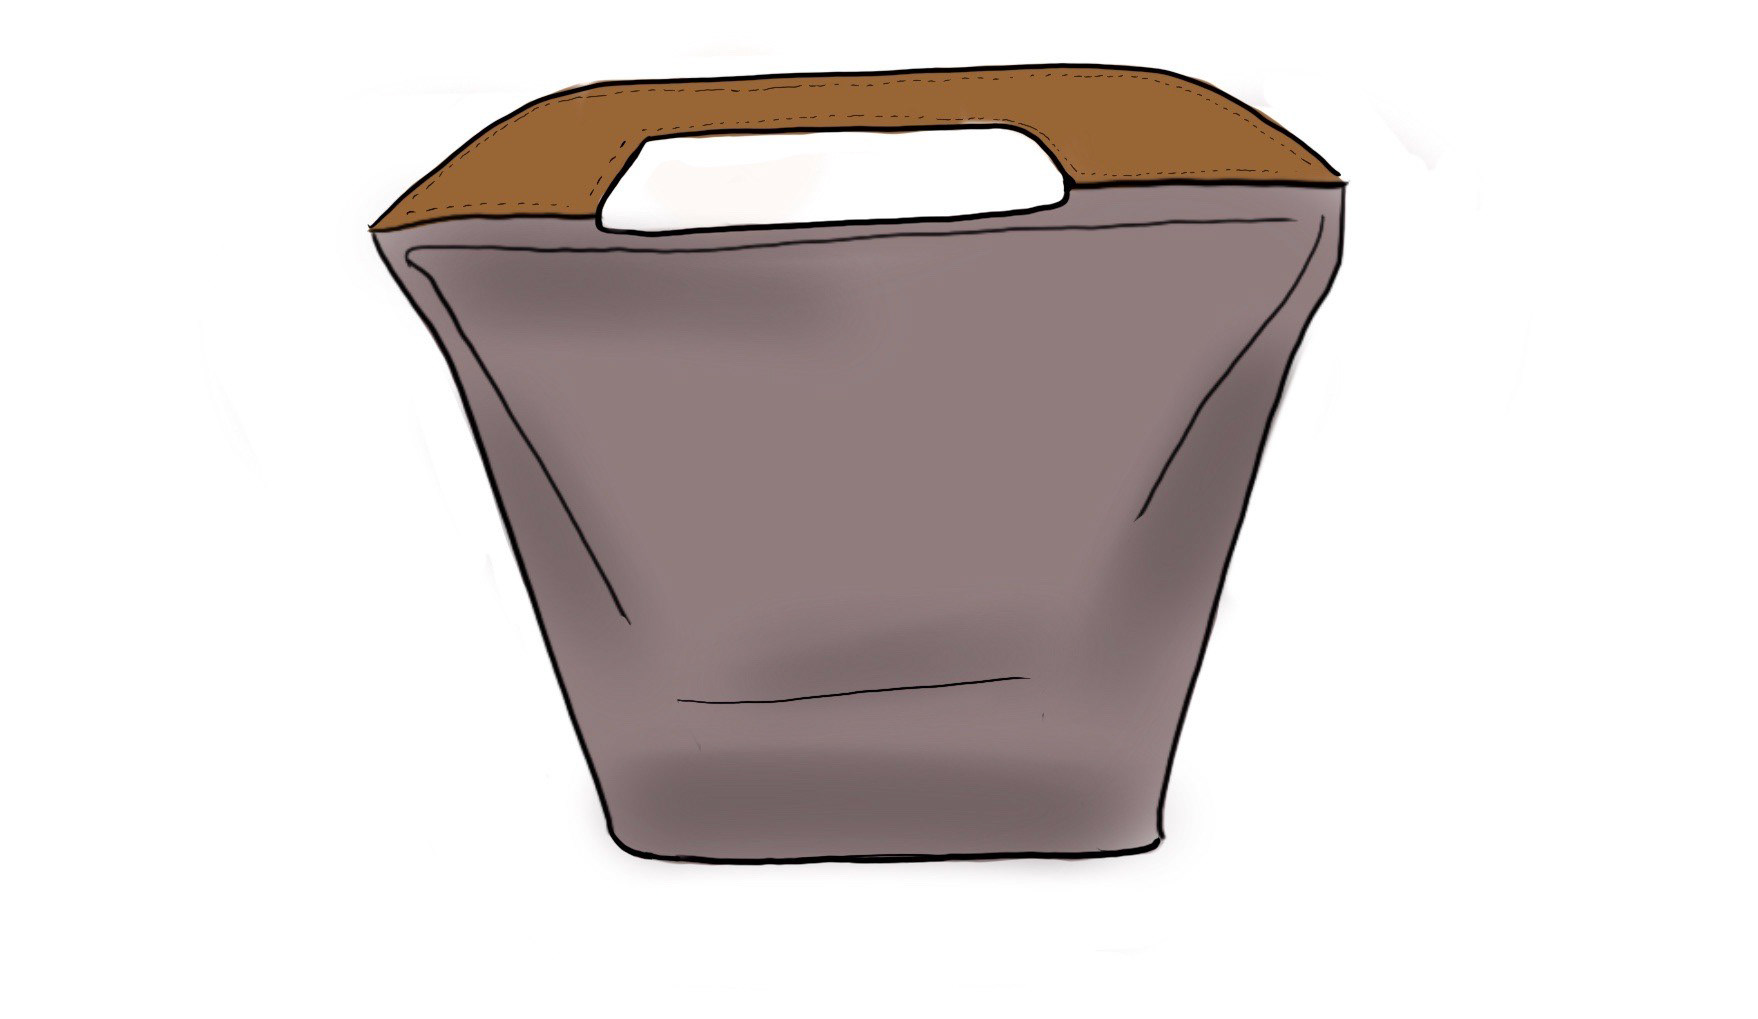
The sketches below are of our final concept. This concept is of a bag that collapses into a bag but when opened it lies flat to create a separate work space Initially it was a pencil case but over time it evolved into a lunchbox.
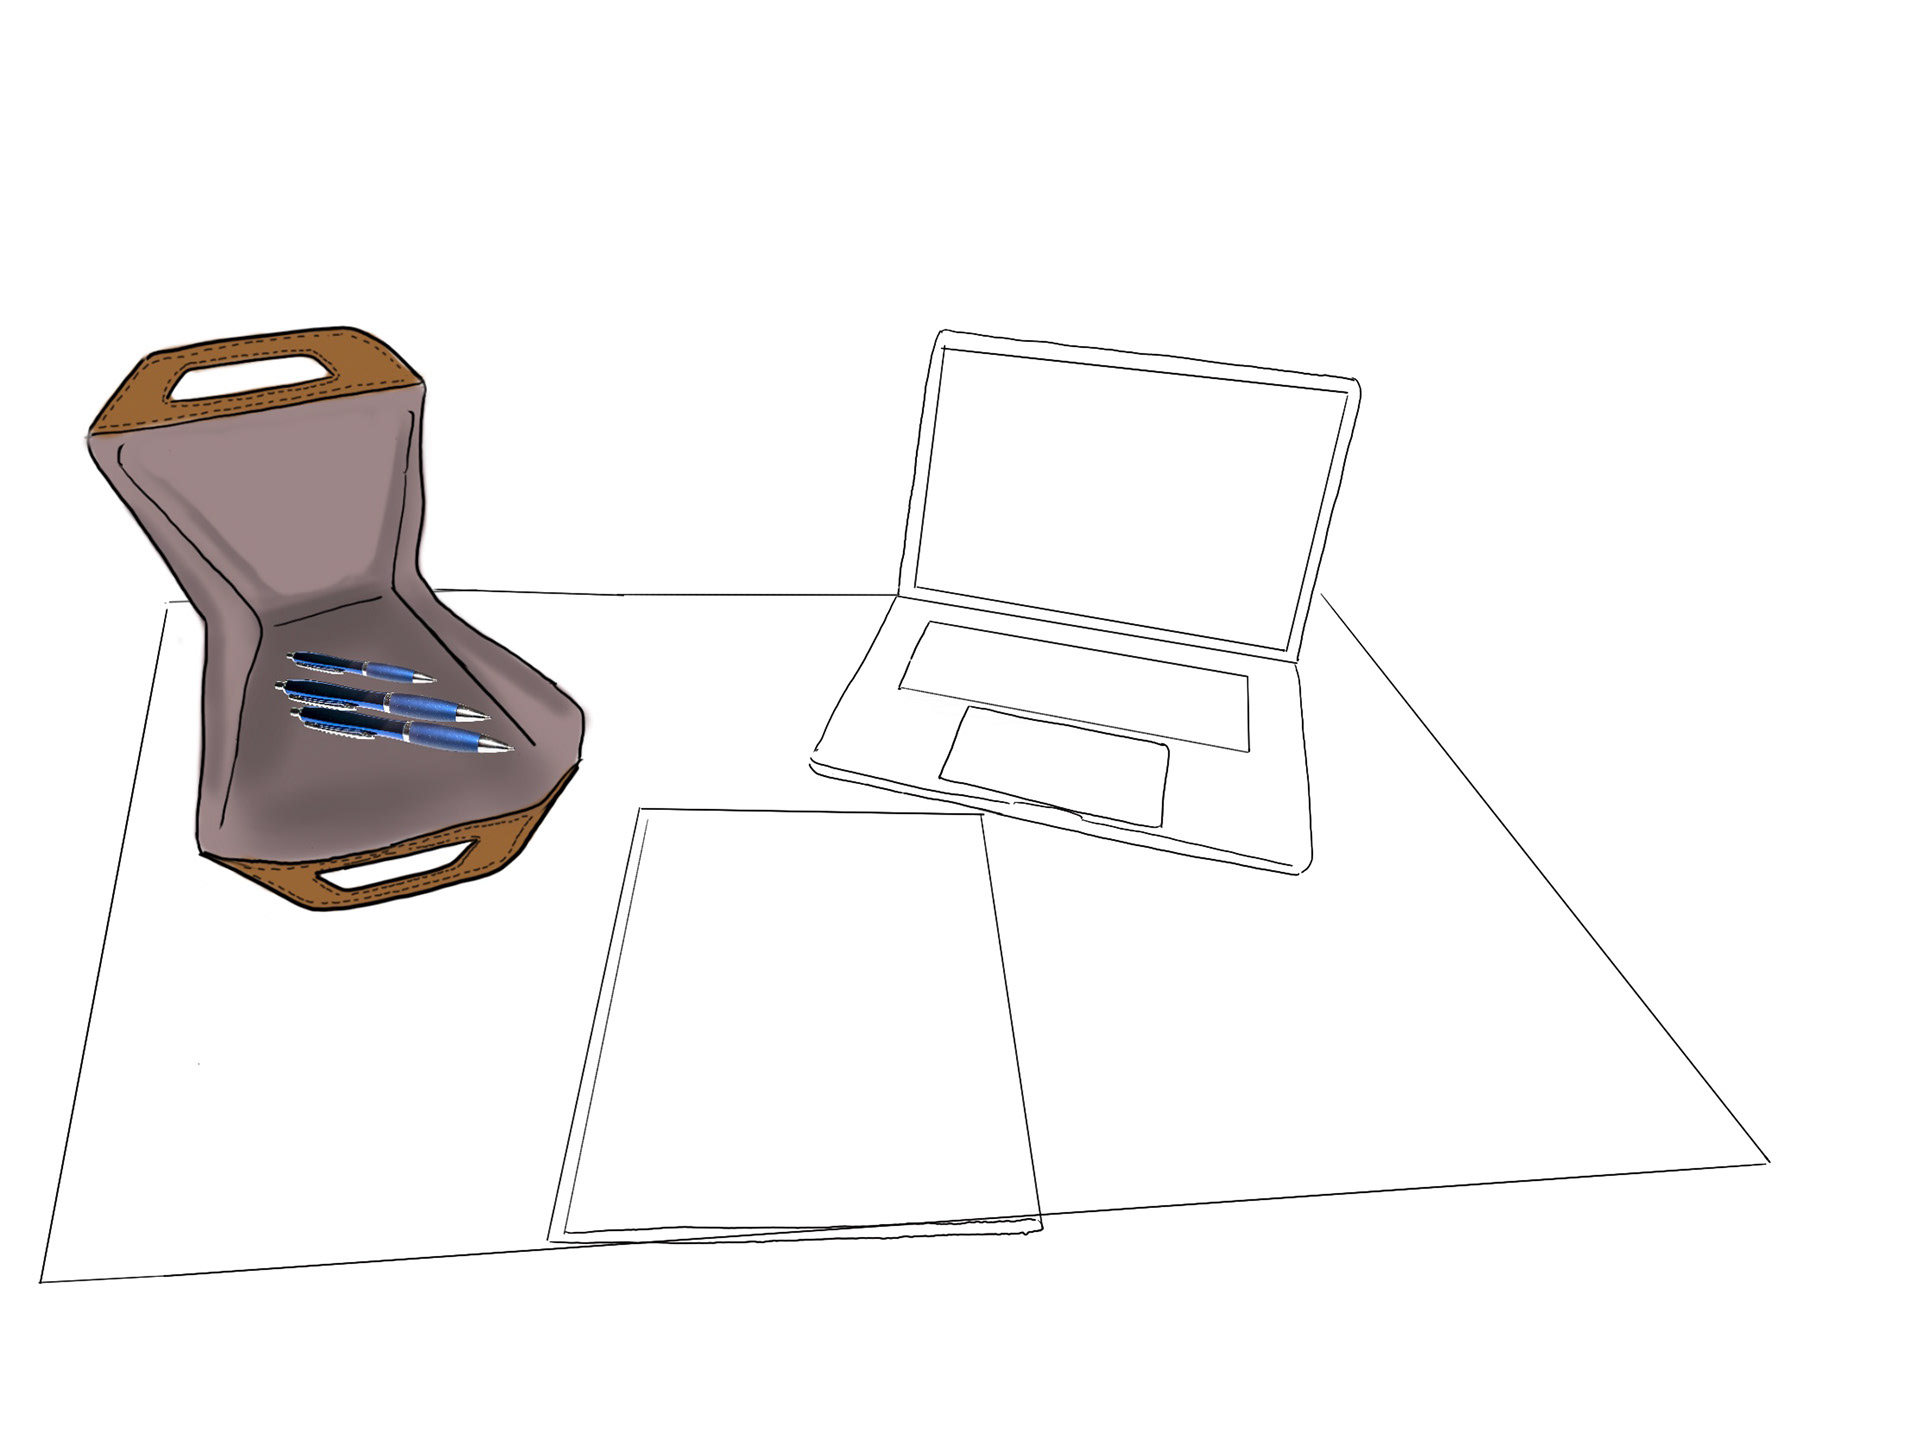
The paper prototype demonstrates the collapsing and opening.
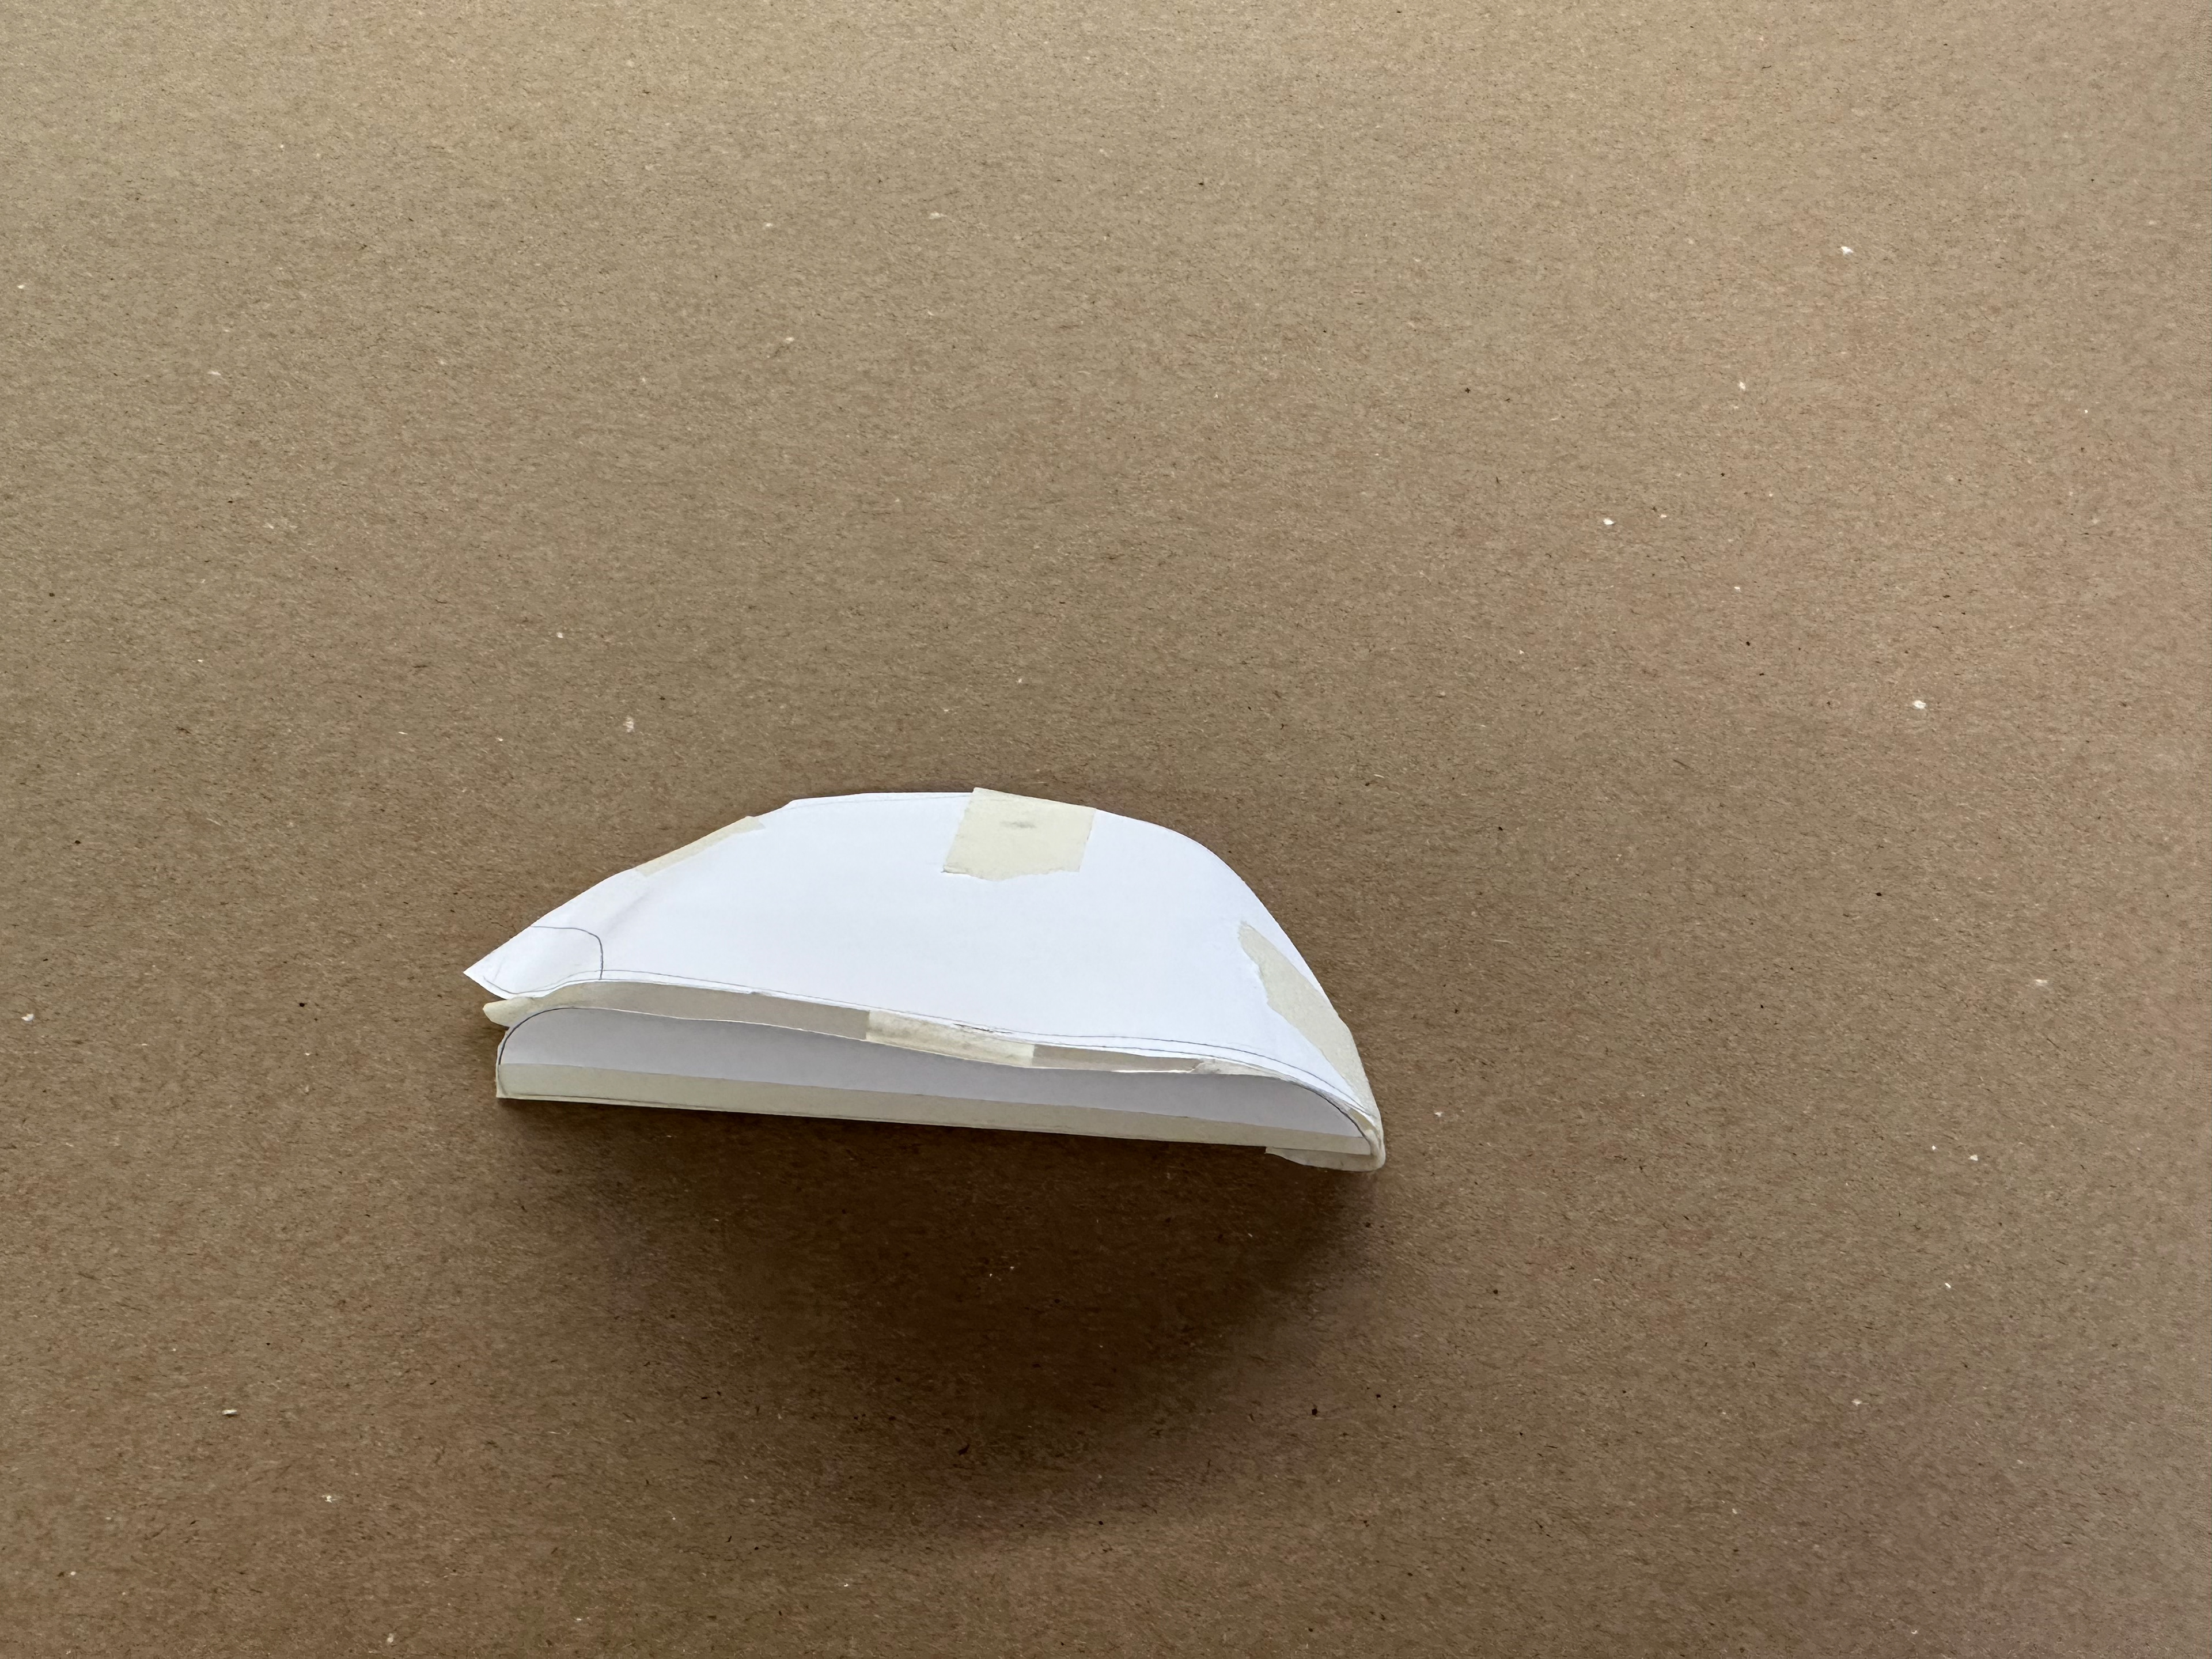
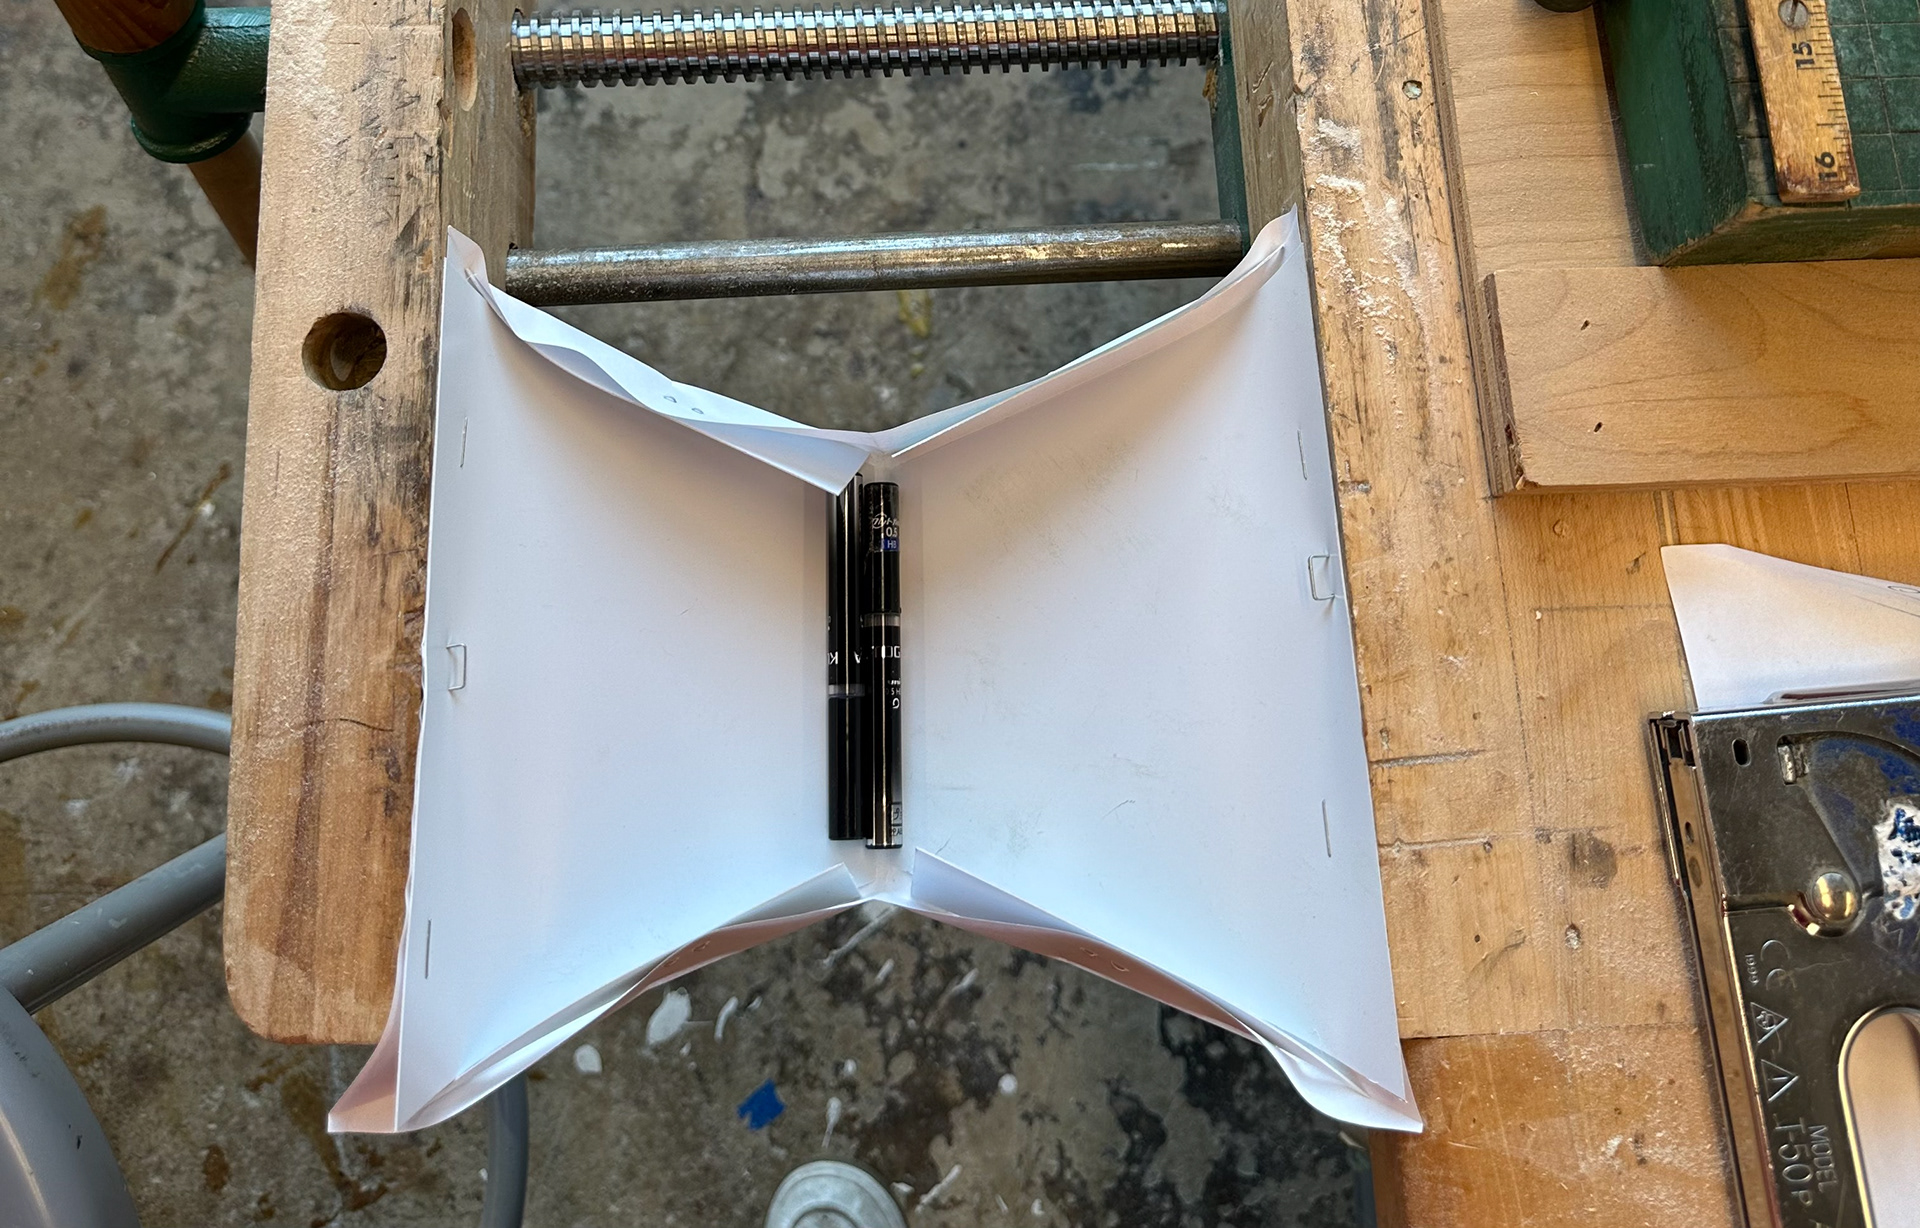
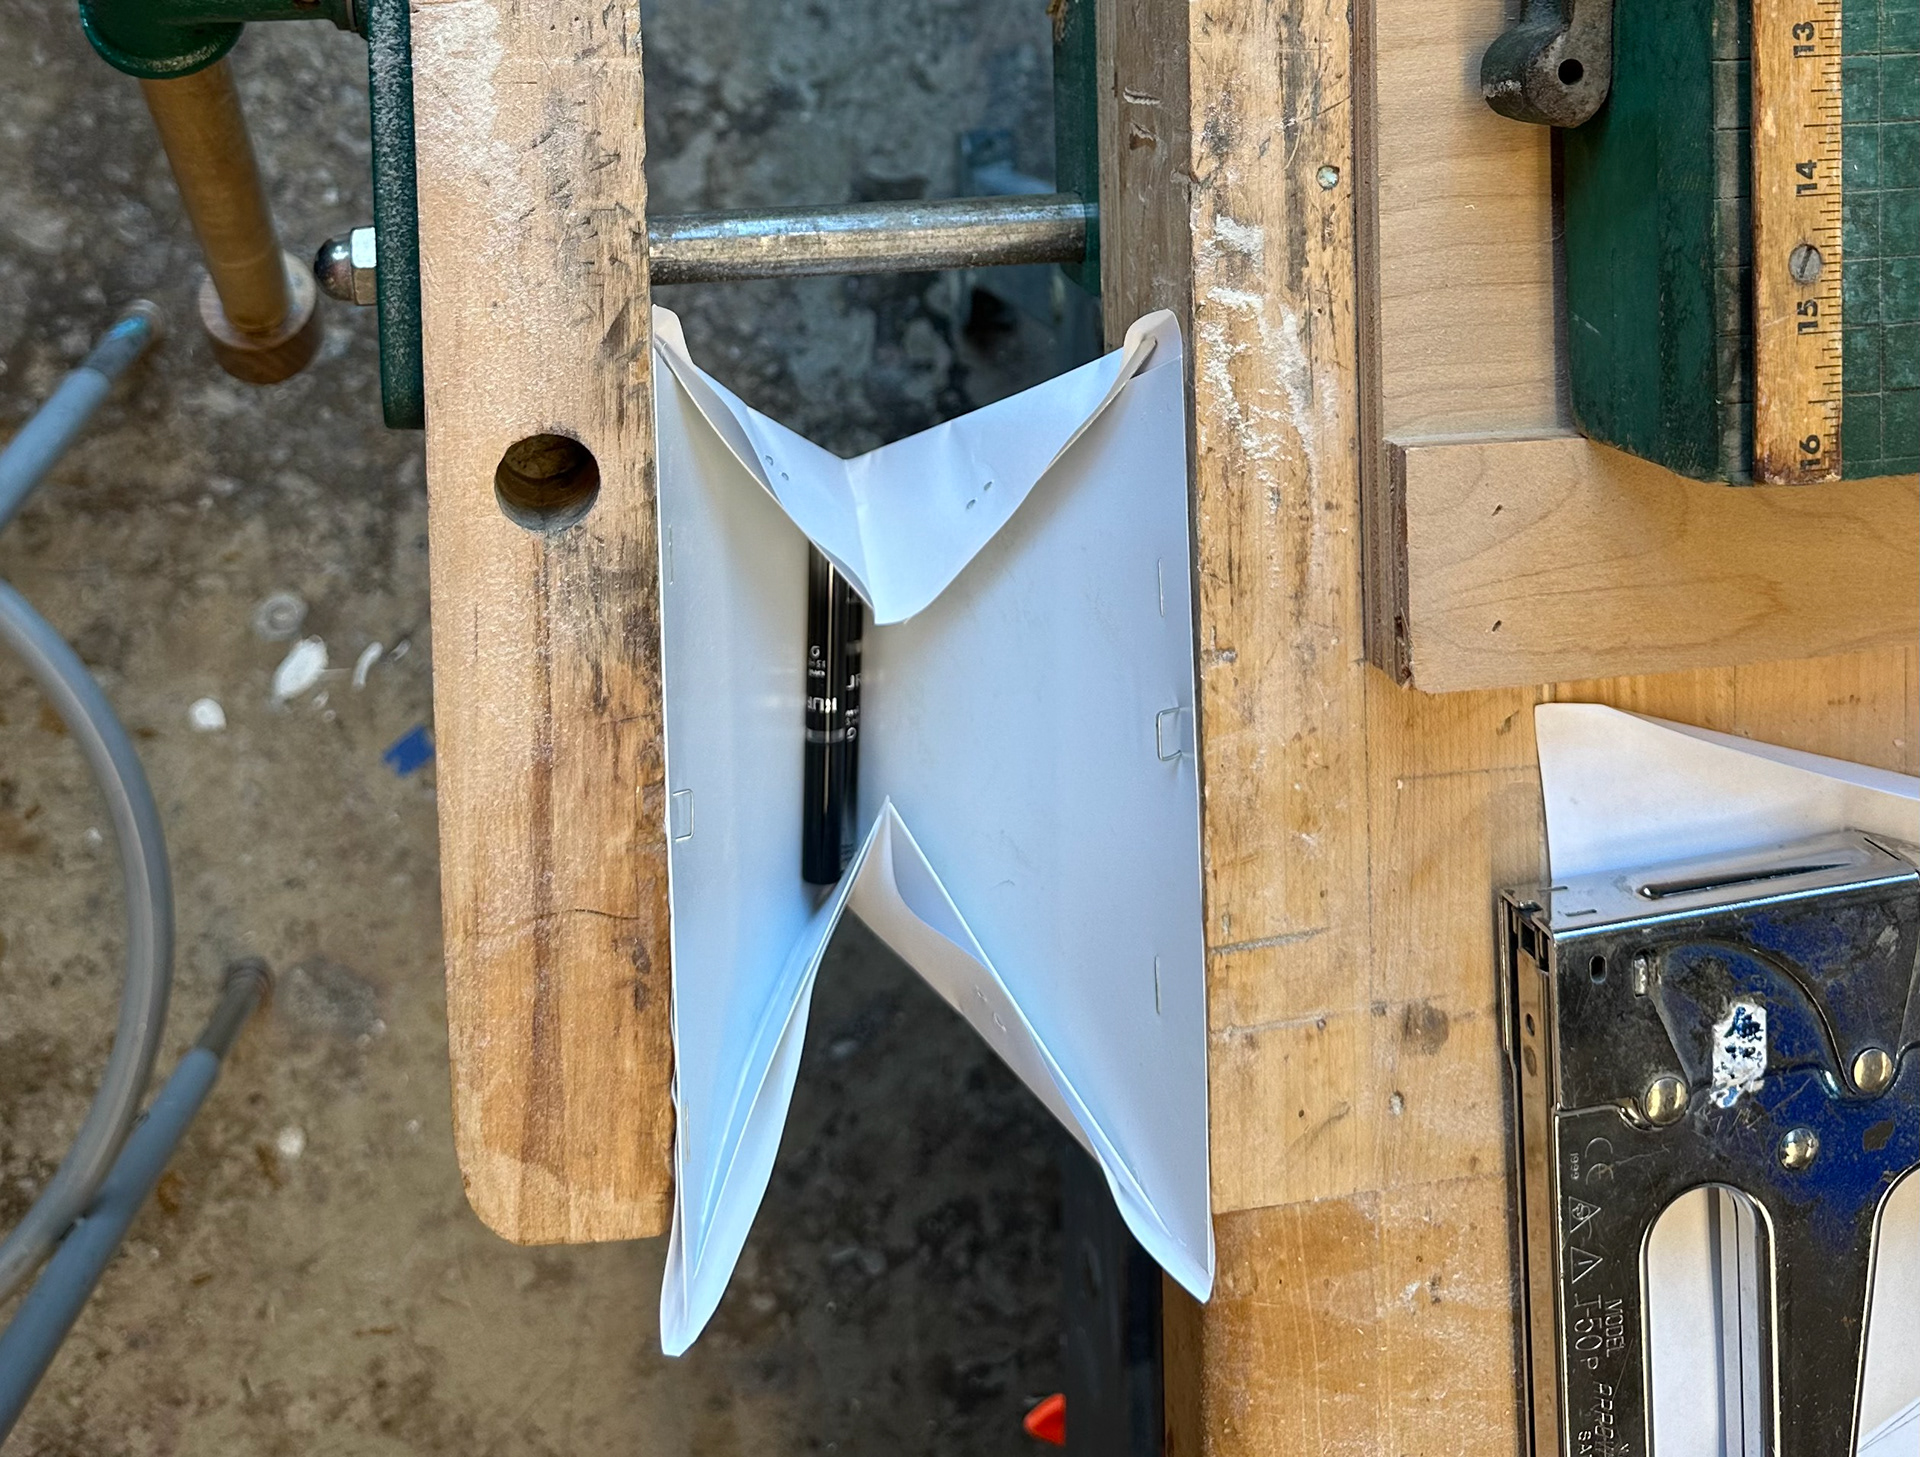
Prototype 1
I used the template of the paper prototype to create a refined version using chipboard and cloth. This fabric was ugly and too thin. I didn't like the feeling of chipboard underneath but it demonstrated the viability of our initial concept.


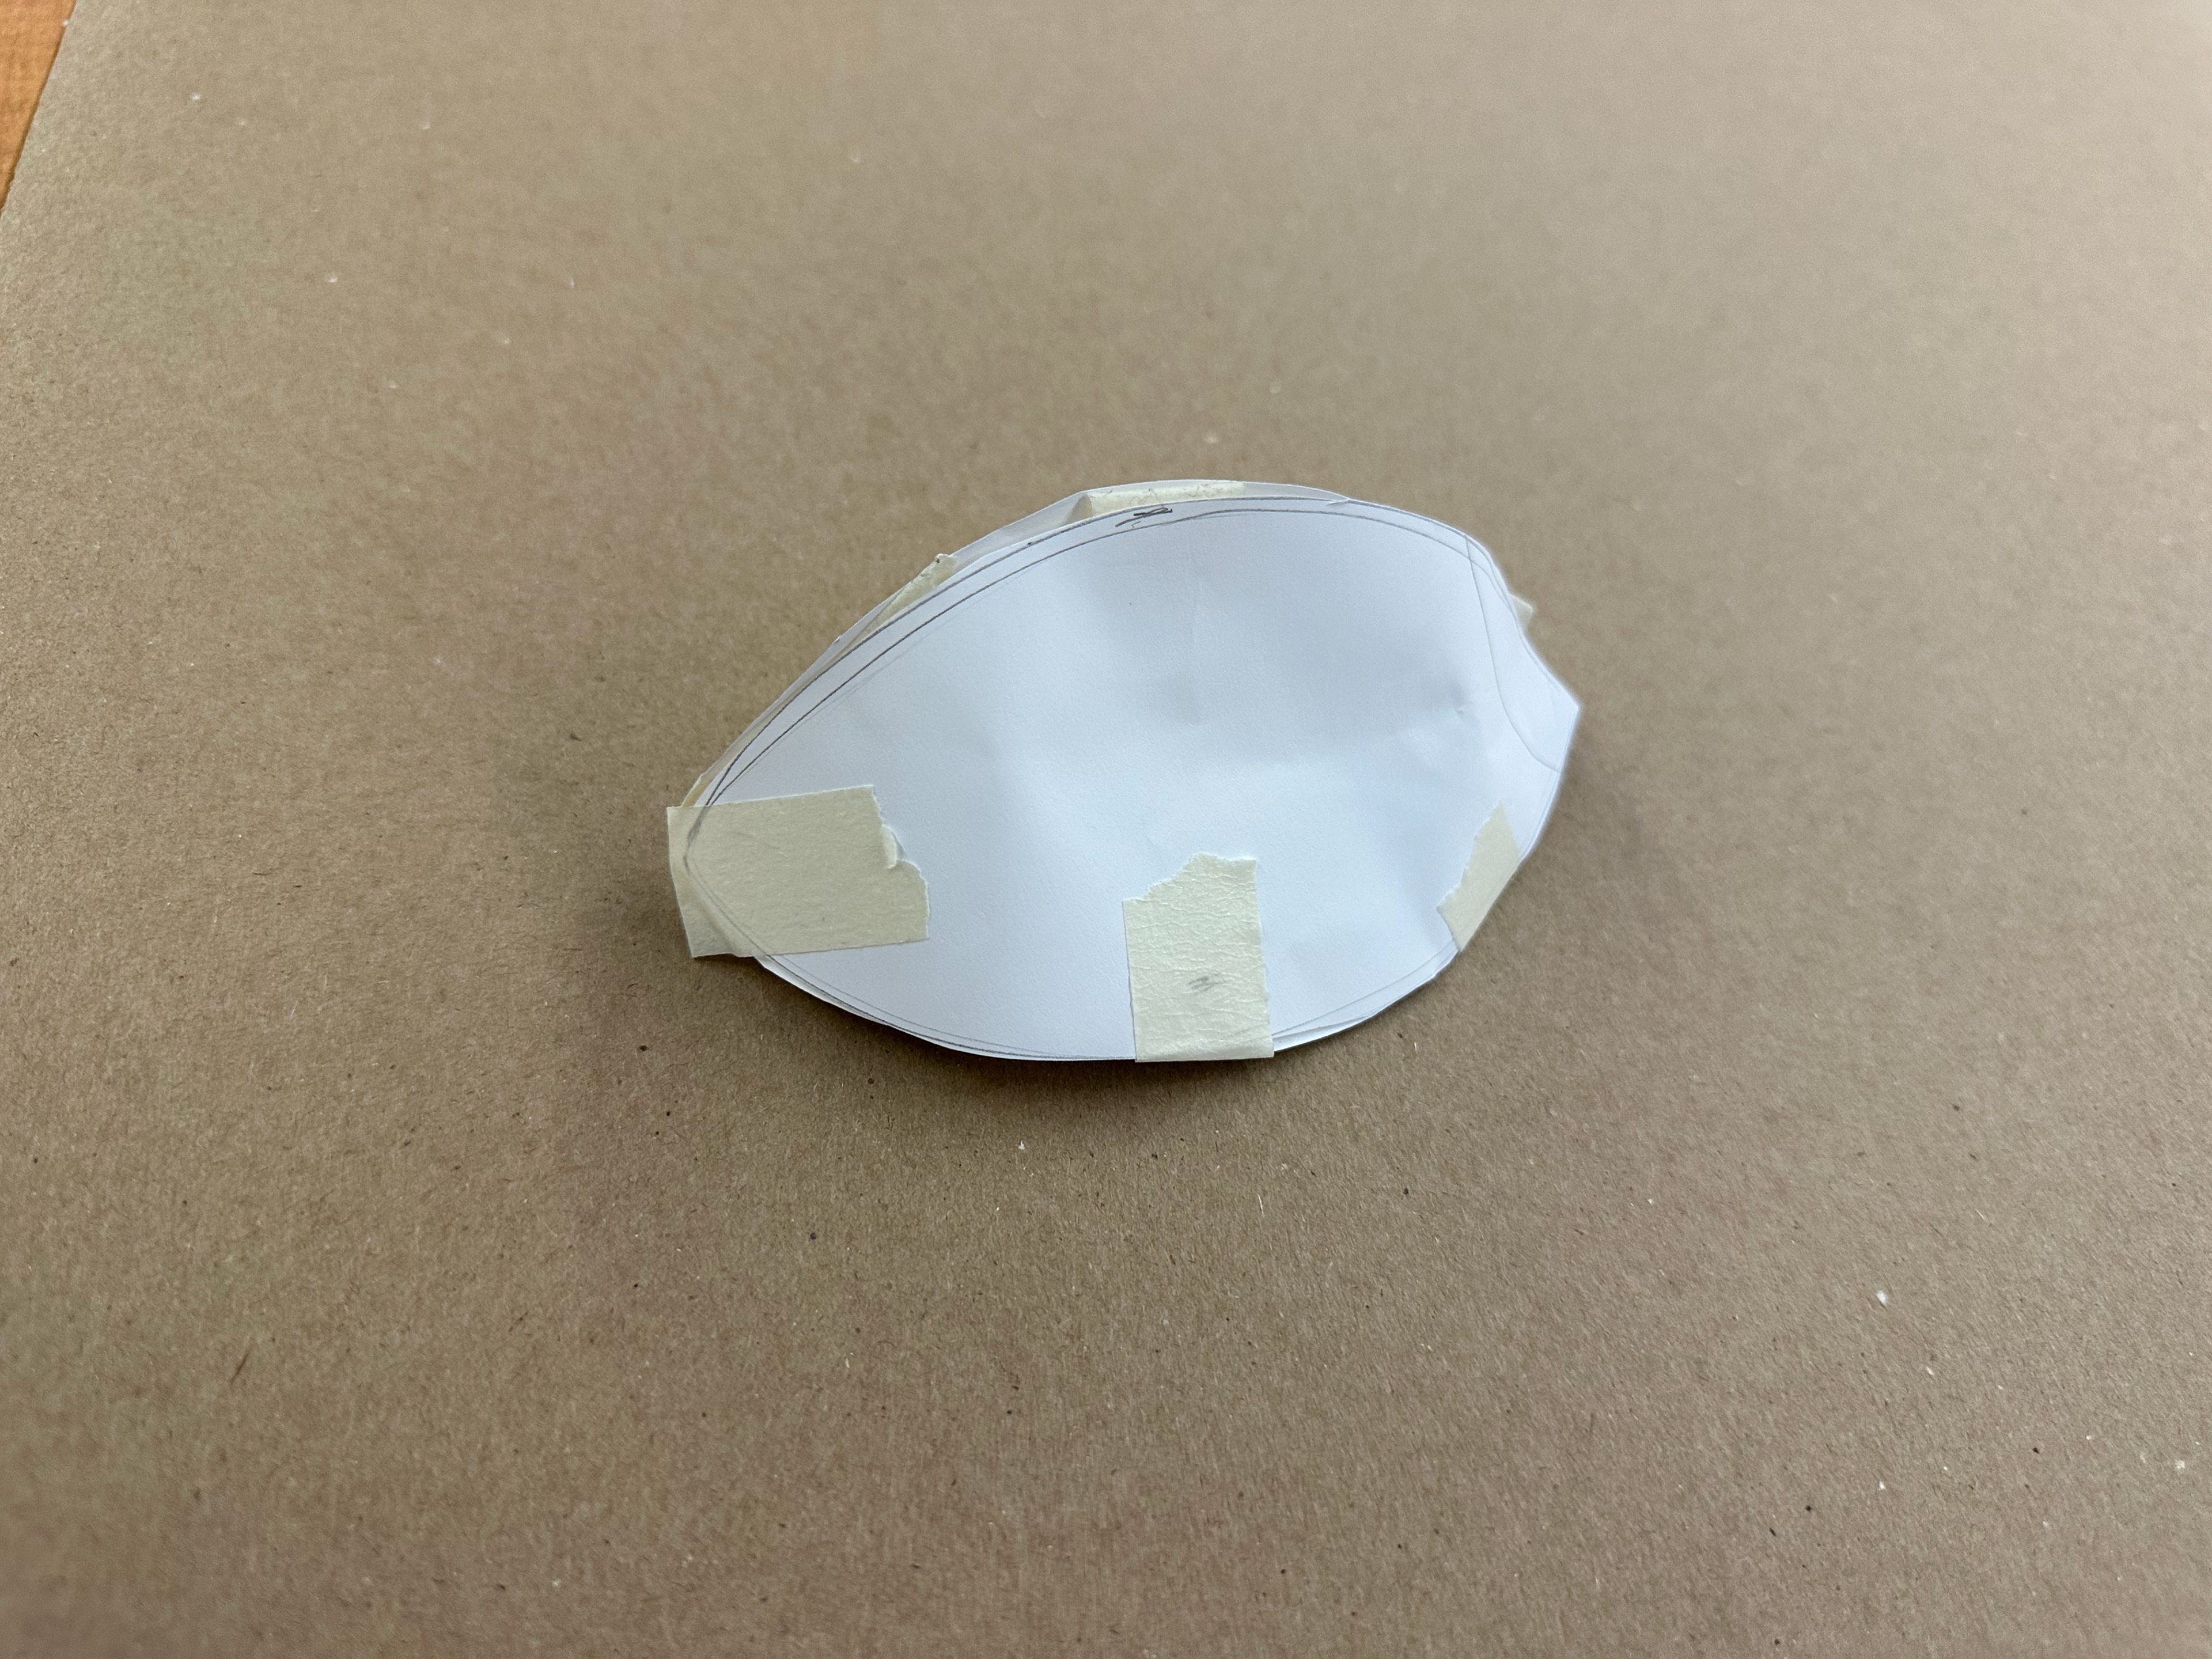
Prototype 2
This prototype used thicker fabric. It also opened and closed better. I was still unhappy with the chipboard on the inside because of its feel and because it wasn't flexible enough so it didn't expand enough to hold many different items.

Prototype 3 &4
I experimented with different materials and and sewing the pattern without laminating chipboard between the cloth. This was unsuccessful because the fabric wouldn't move the same without the chipboard. I'm glad I experimented with it because it demonstrated the importance of an inner structure.


Prototype 5
For this prototype I experimented with materiality. I decided to use notebook covers. However this type of plastic was too floppy. It expanded well but didn't hold its structure.


Prototype 6
This prototype was the most refined. However, it was a bit too small as a lunch box. The handle was too small; however, my craft had improved significantly from the first prototype.


Prototype 7
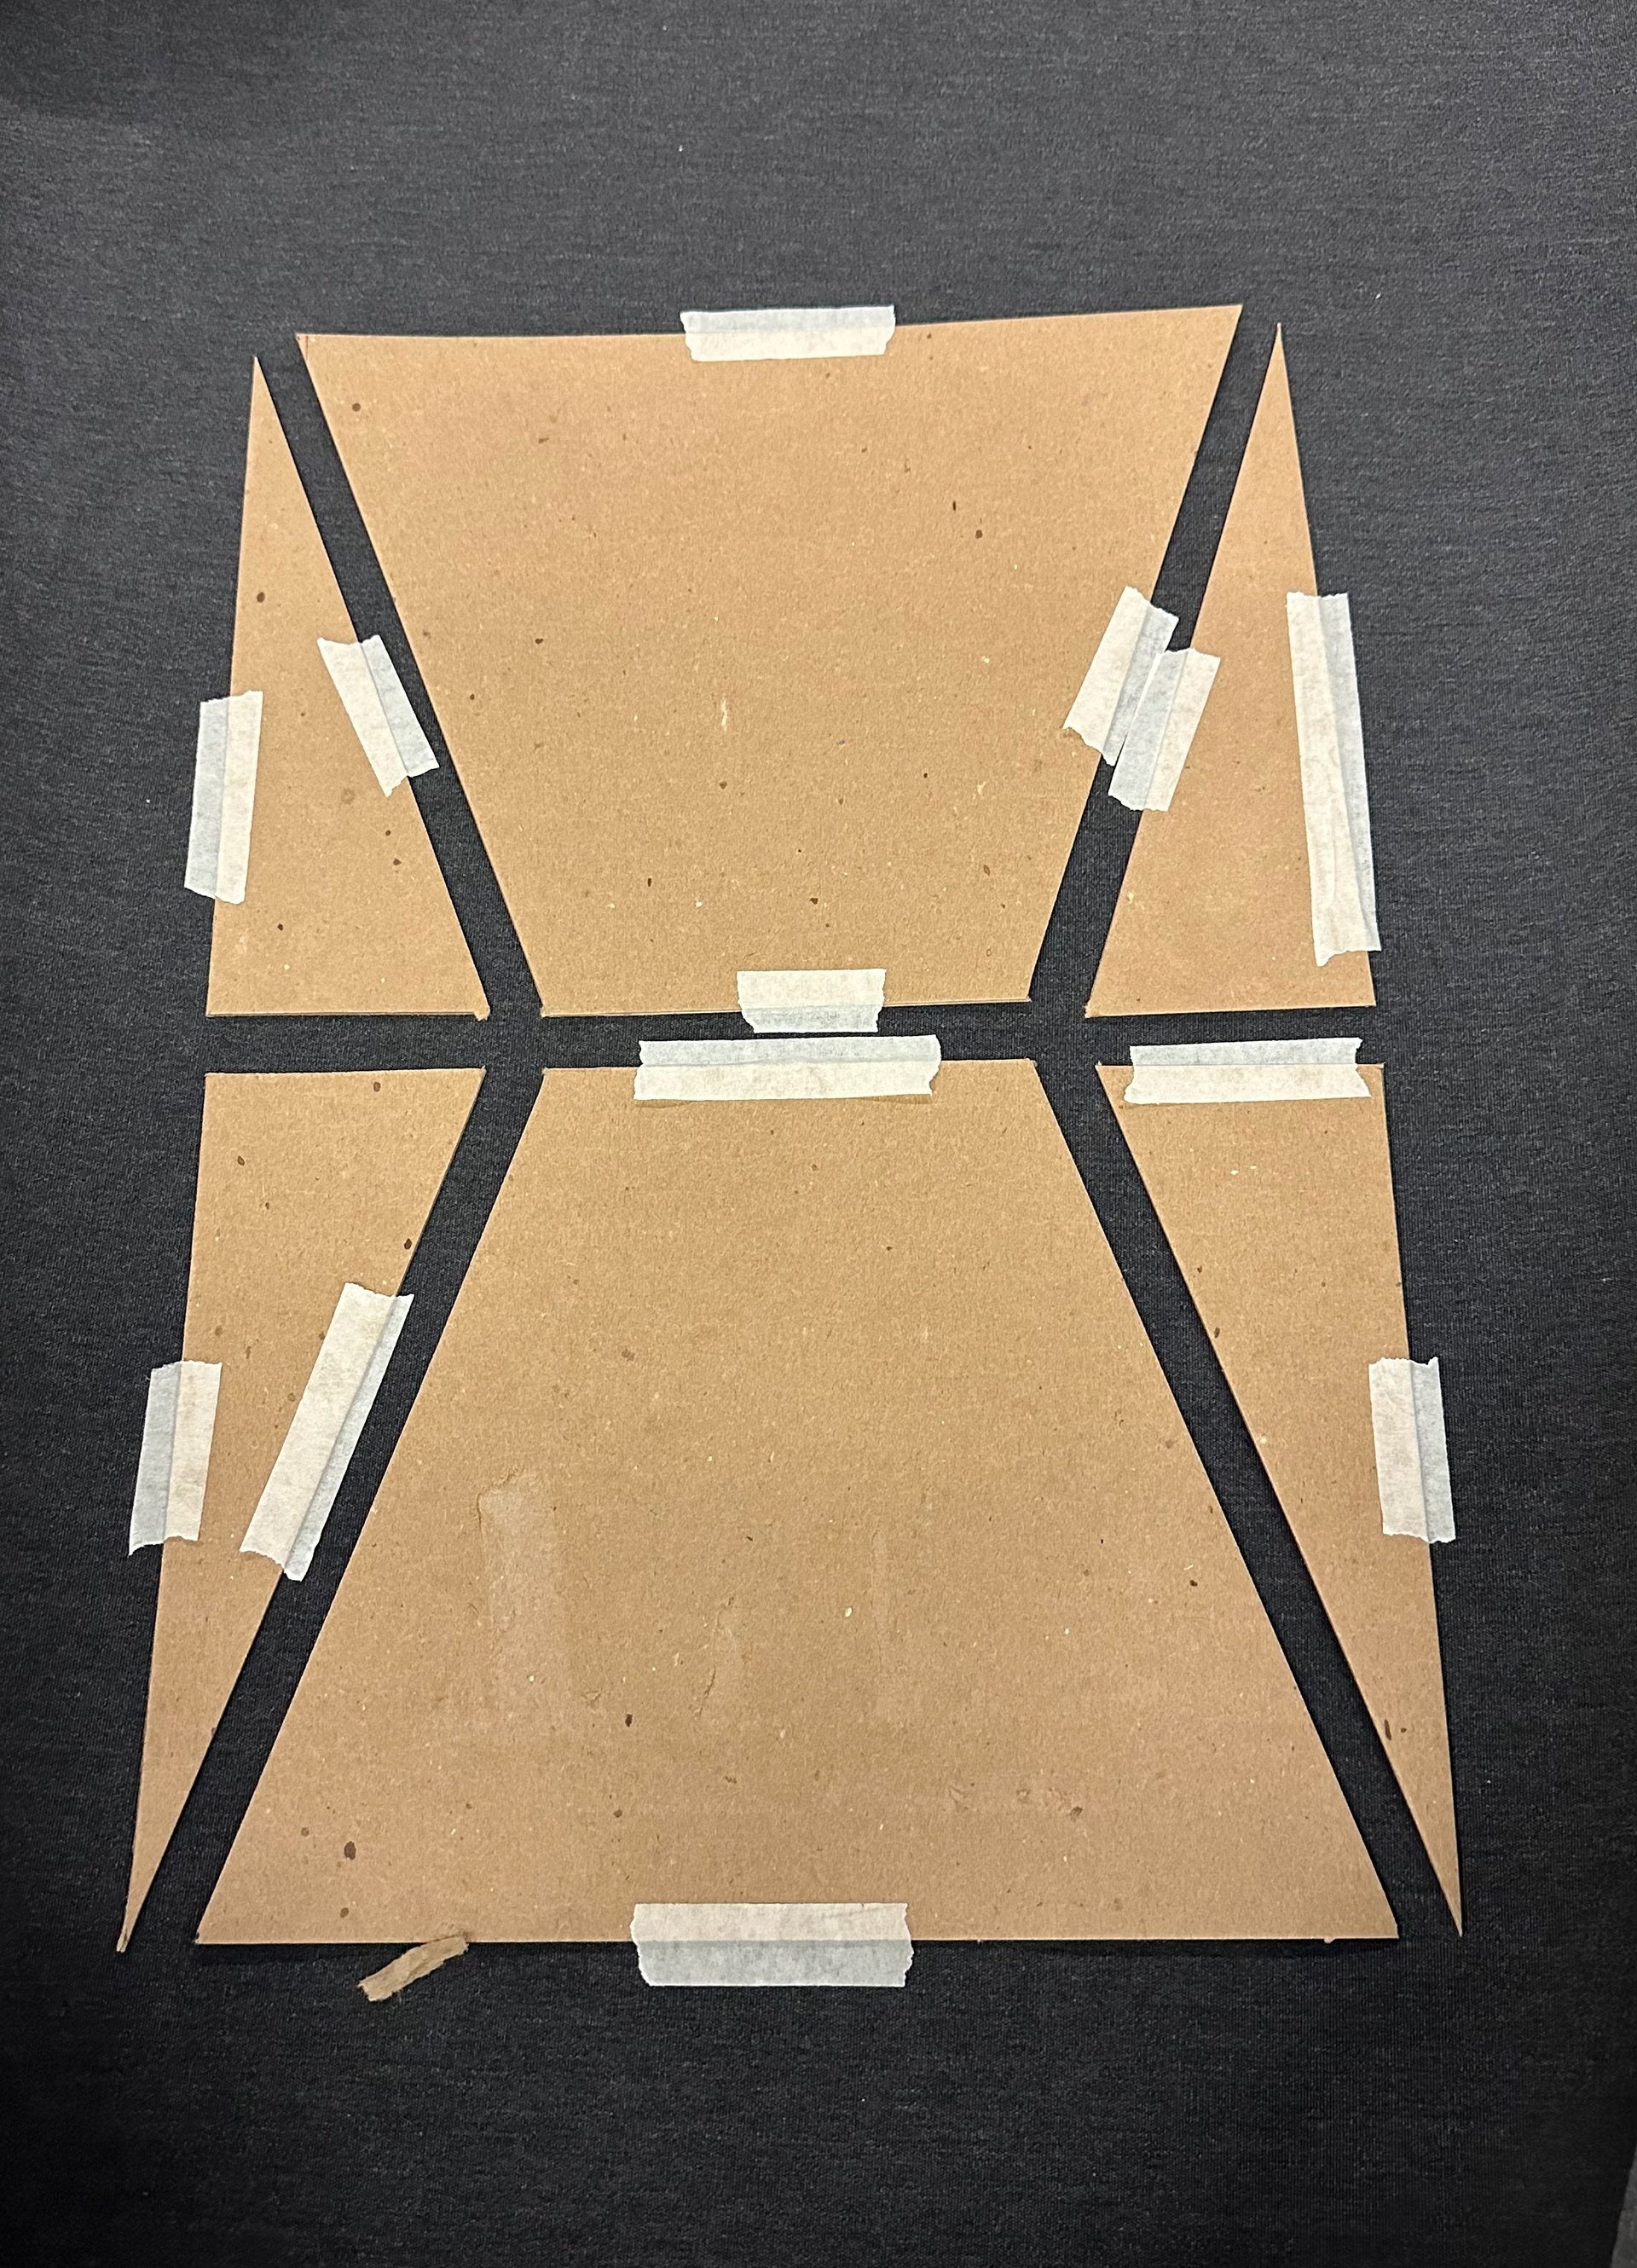
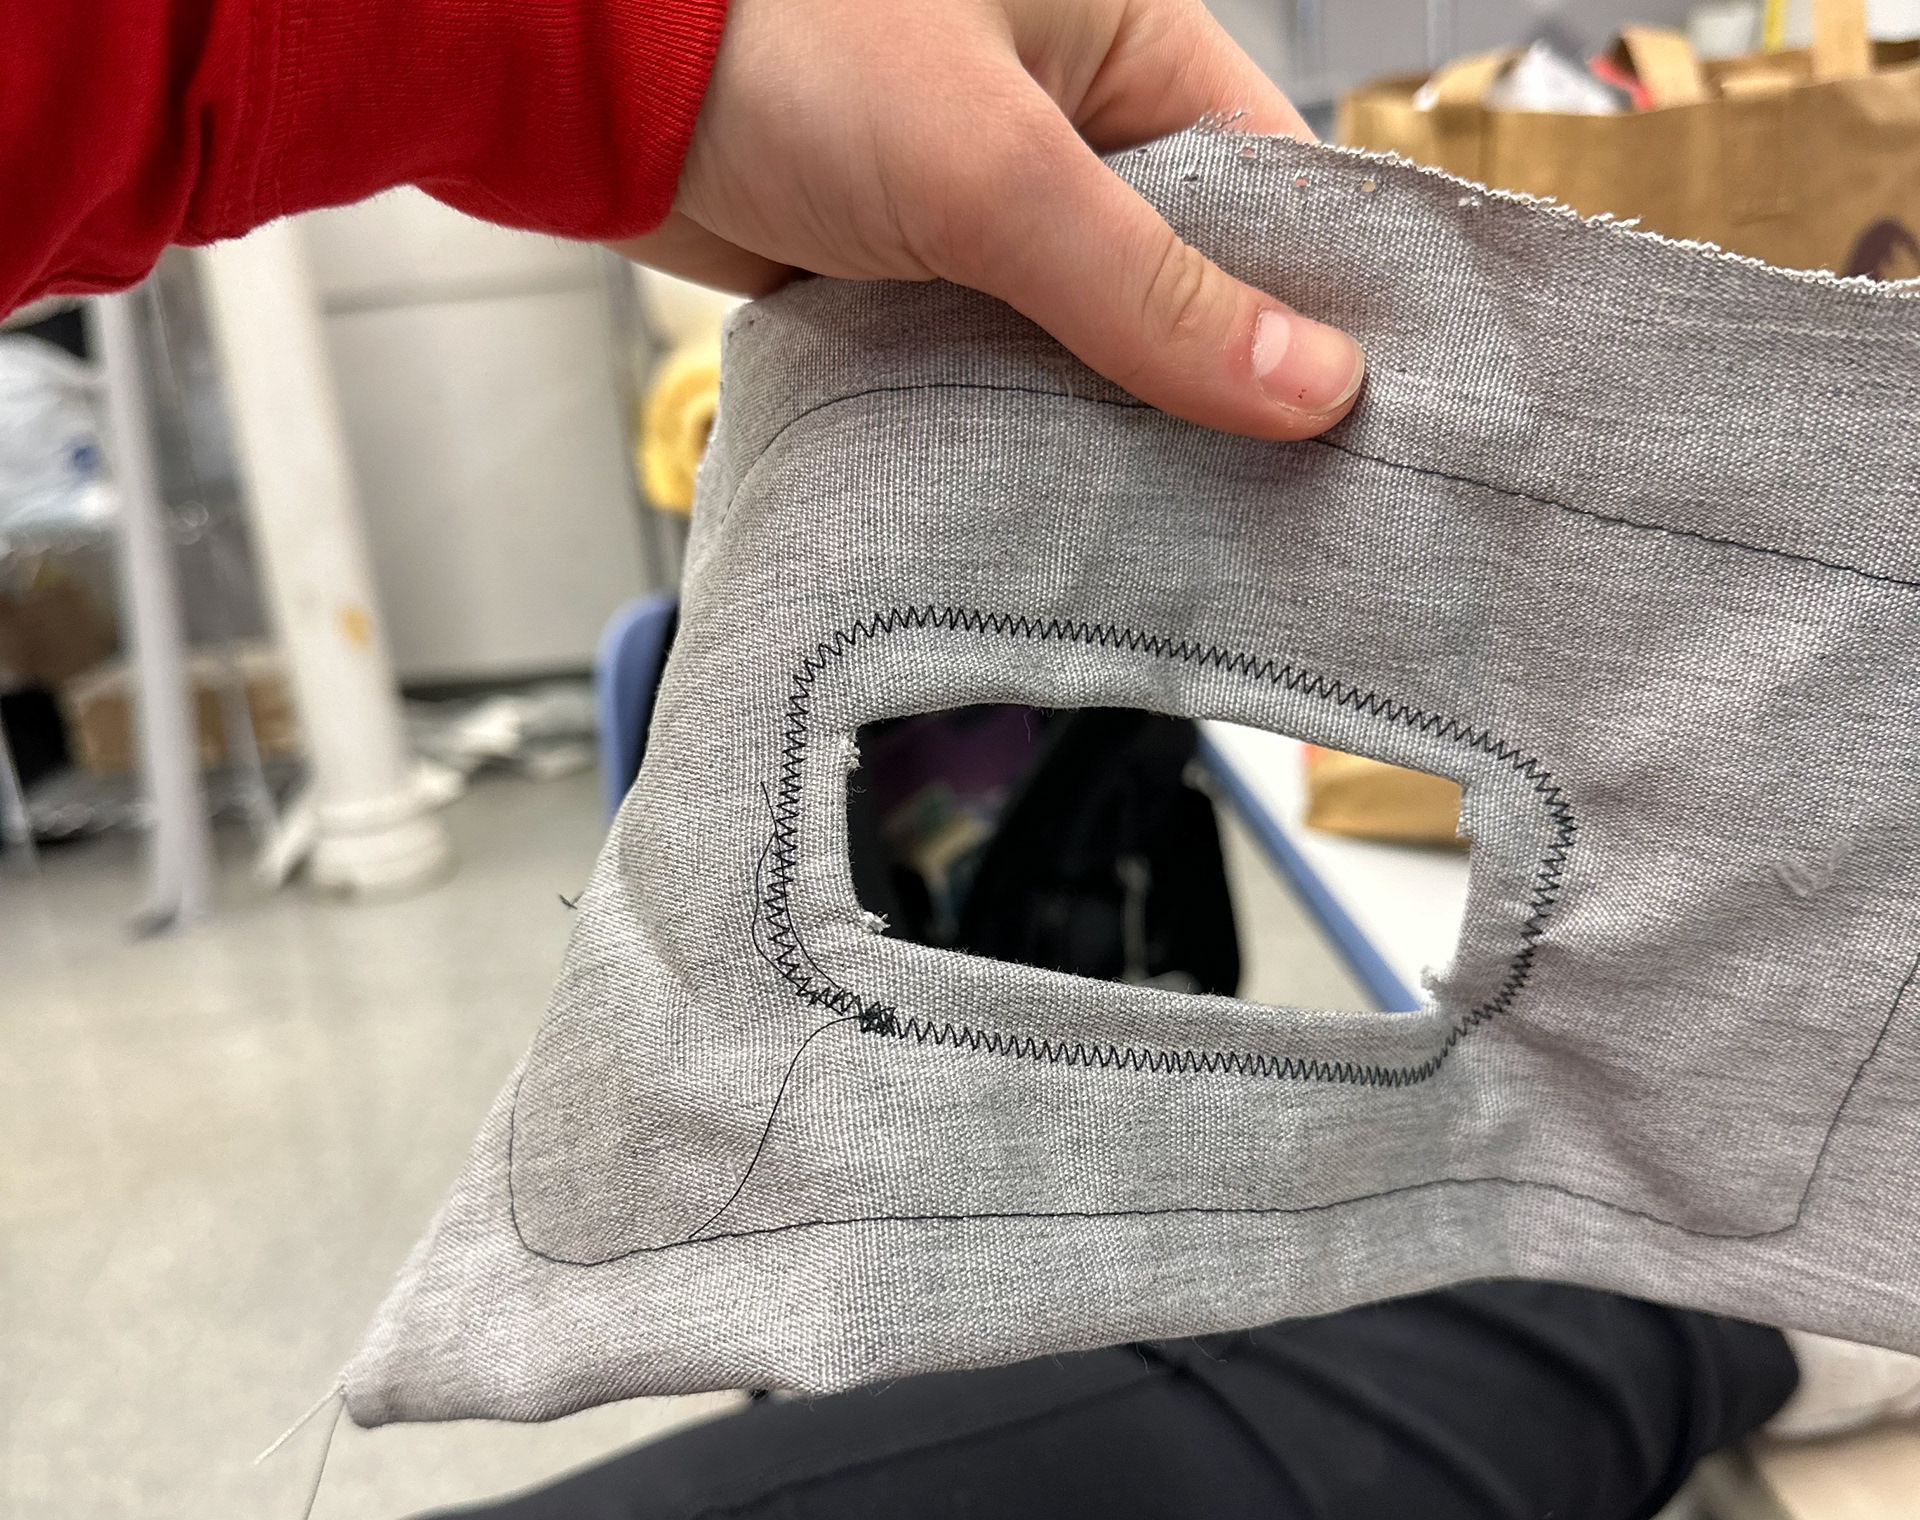
This prototype had a minor change in construction. I split the big trapezoidal piece into two which helped with the flexibility and folding of the bag. Additionally, I used a different type of plastic that was rigid when folded but easily expanded when things were inside it. Additionally, we experimented with the handle with this prototype.


Handle Prototype
The image on the left shows a handle that's sewn as if it were a button hole. It was viable; however, it was too flimsy and it would be too time consuming and inconsistent in the manufacturing process. Ben designed the 3d printed handle prototype on the right. It inserted into the hole. This made the manufacturing process more efficient and more consistent.

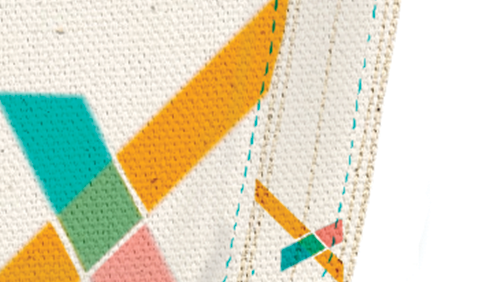
Final Prototype and Manufacture
We decided to go with the plastic and pattern from prototype 7. The final change was making the bag a little larger. My partner and I created an assembly line. The most challenging part was sewing the edges and corners. This was my first pattern, since I had only learned to sew a couple months ago. Overall, I'm pretty happy with the final outcome; however, it needs more refinement. The edges aren't perfectly aligned and not all my lines are aligned with each other. Yet, my sewing significantly improved from the very beginning of this project.

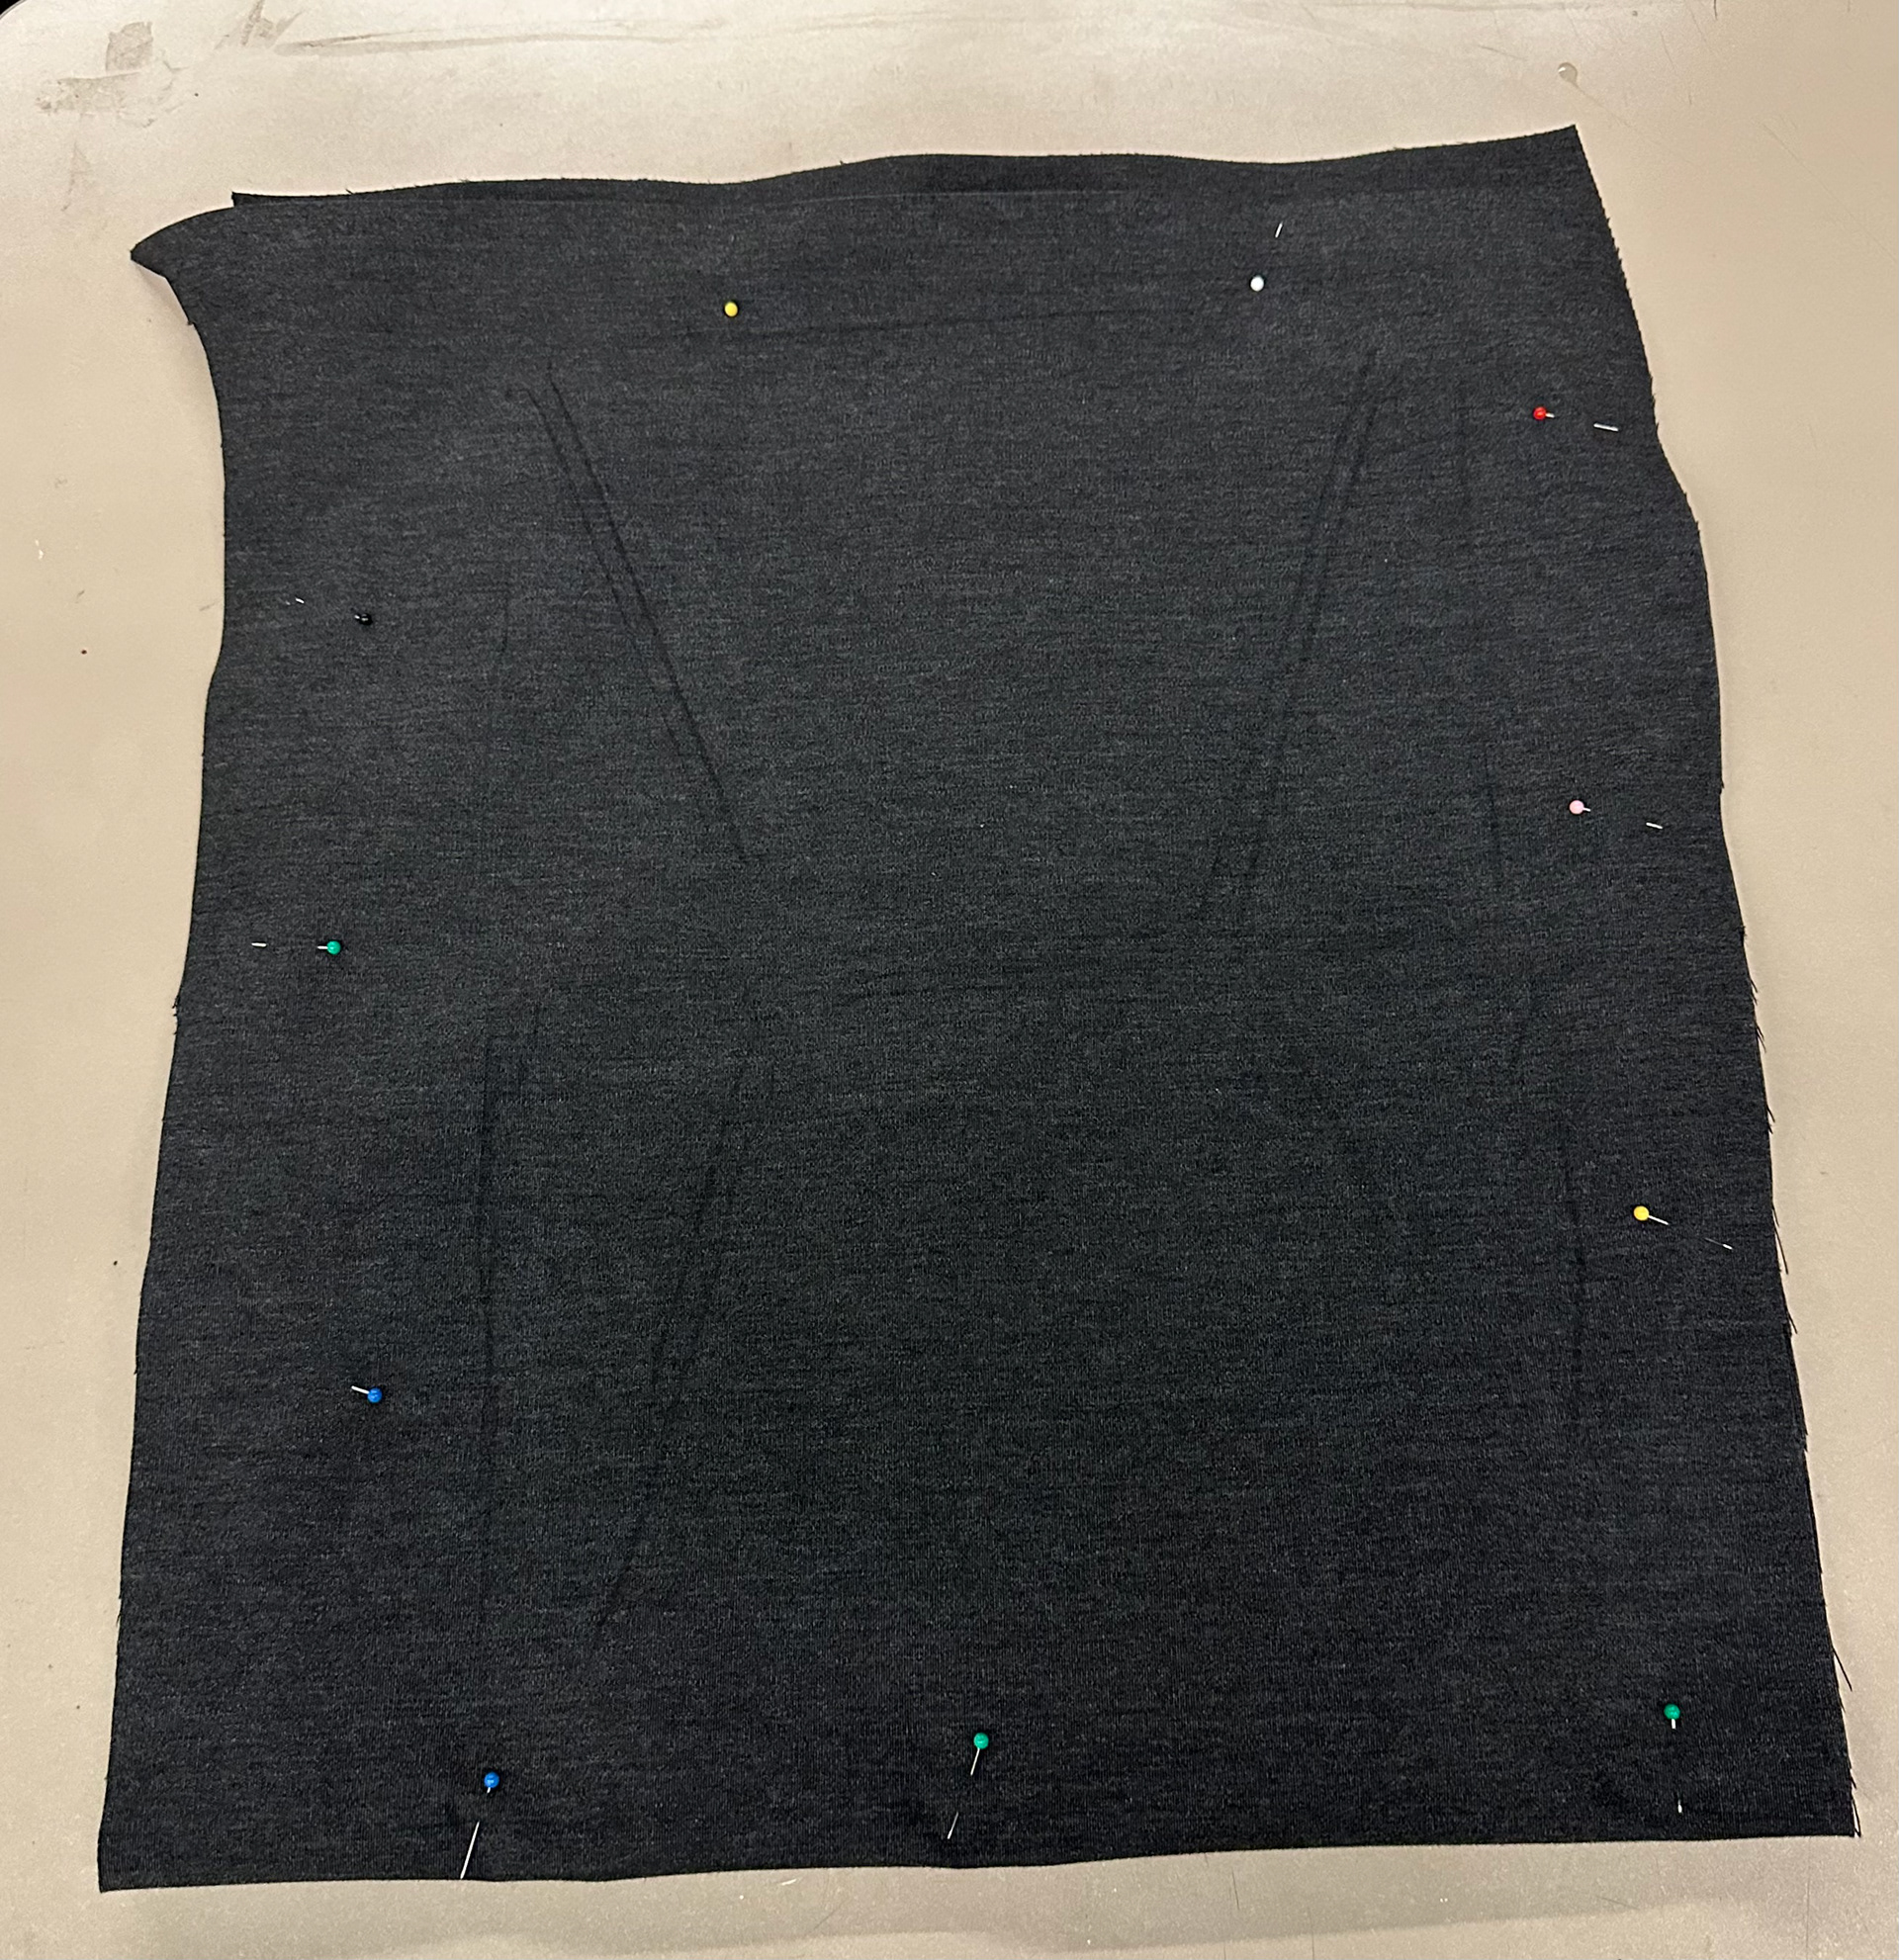
Outlining the pattern using fabric pencil.

Pining the fabric

Ironing the fabric.

Sewing the pattern and edges.

Inserting the handles and snaps.
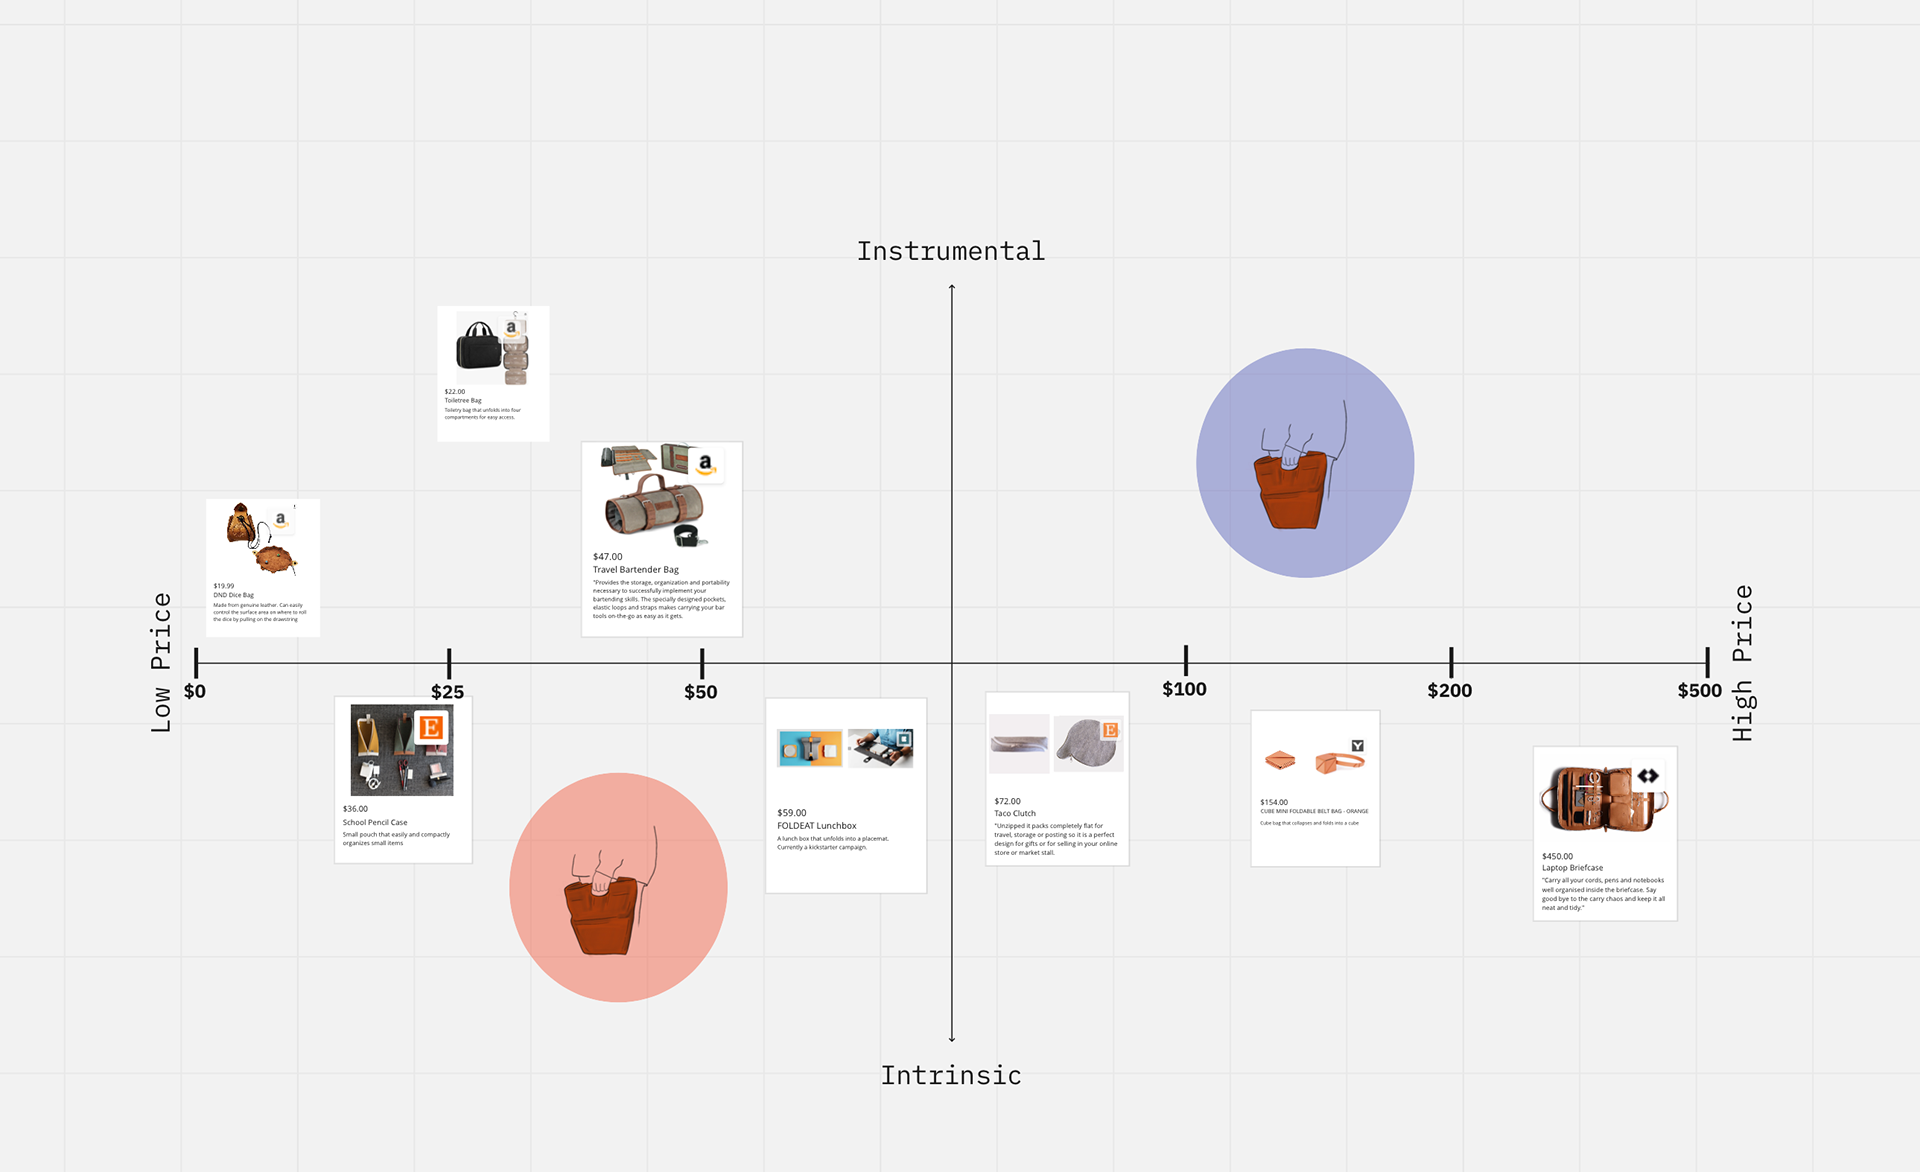
Pricing
Another aspect of this assignment was to brand and research competing products by creating a market analysis graph. The red circle indicates the price range we wanted to target. The blue circle indicates an opportunity to price our bag.
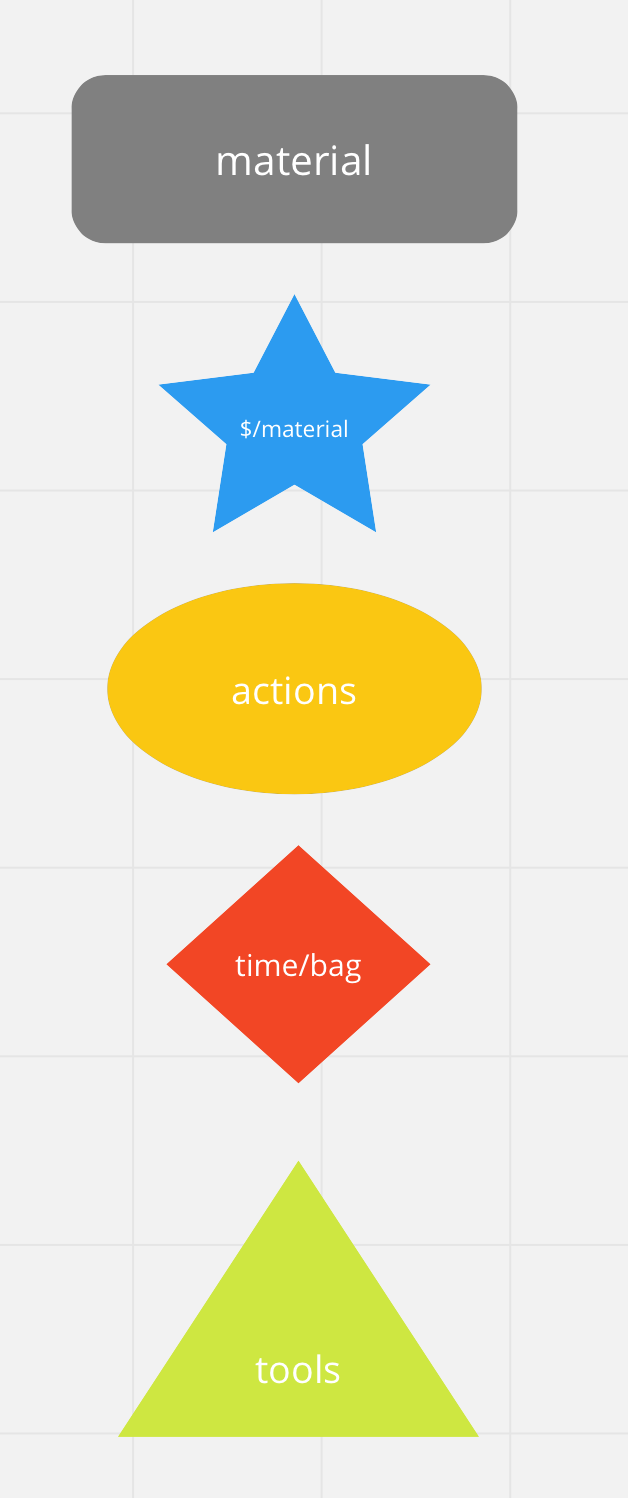
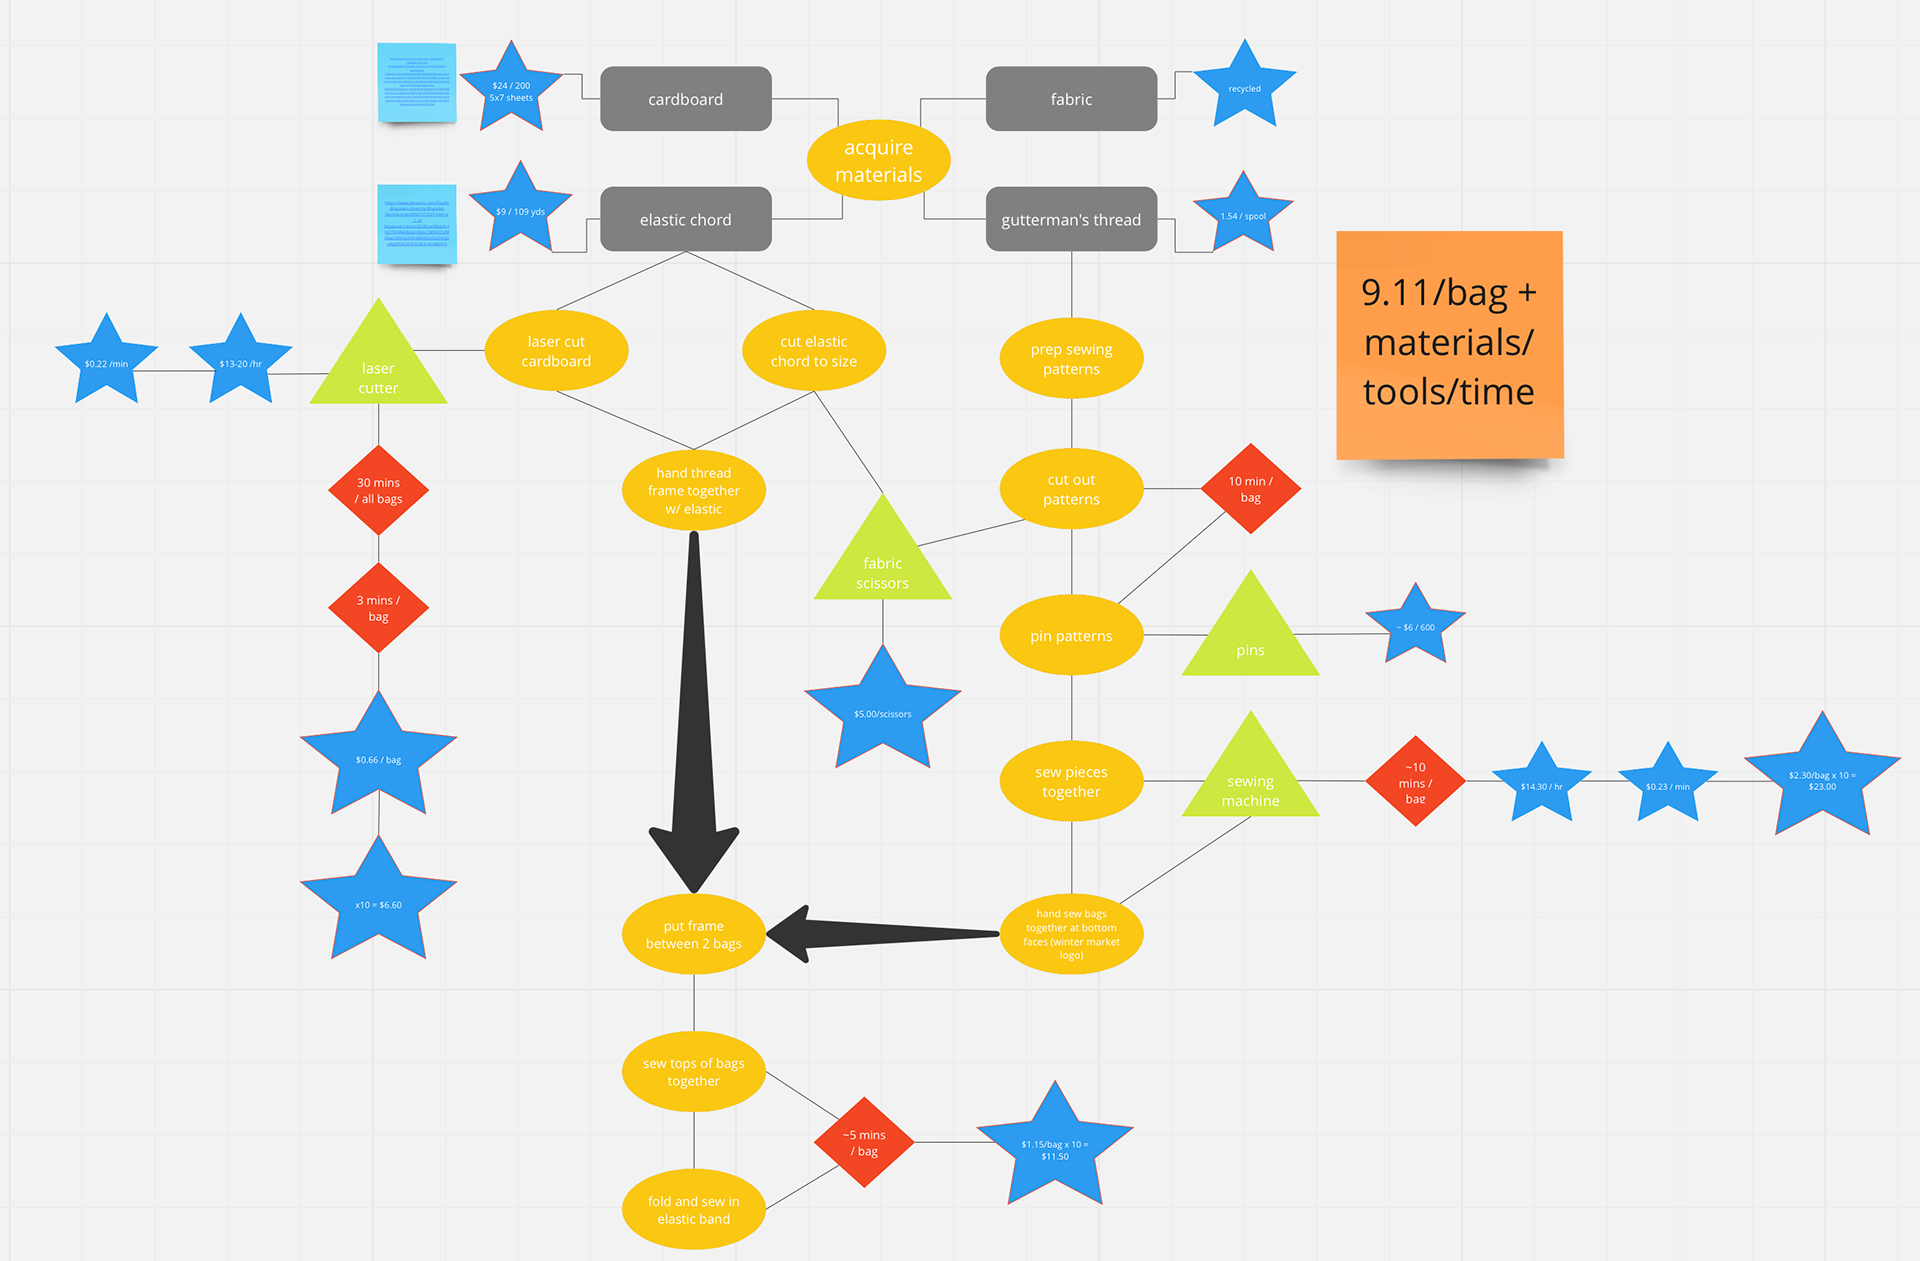
Estimation of Production Cost
Below is a flowchart of estimated production cost. This was the estimation based on the production of the sixth prototype so by the final prototype we had some unanticipated costs like ironing and the 3D printed handles.
Branding

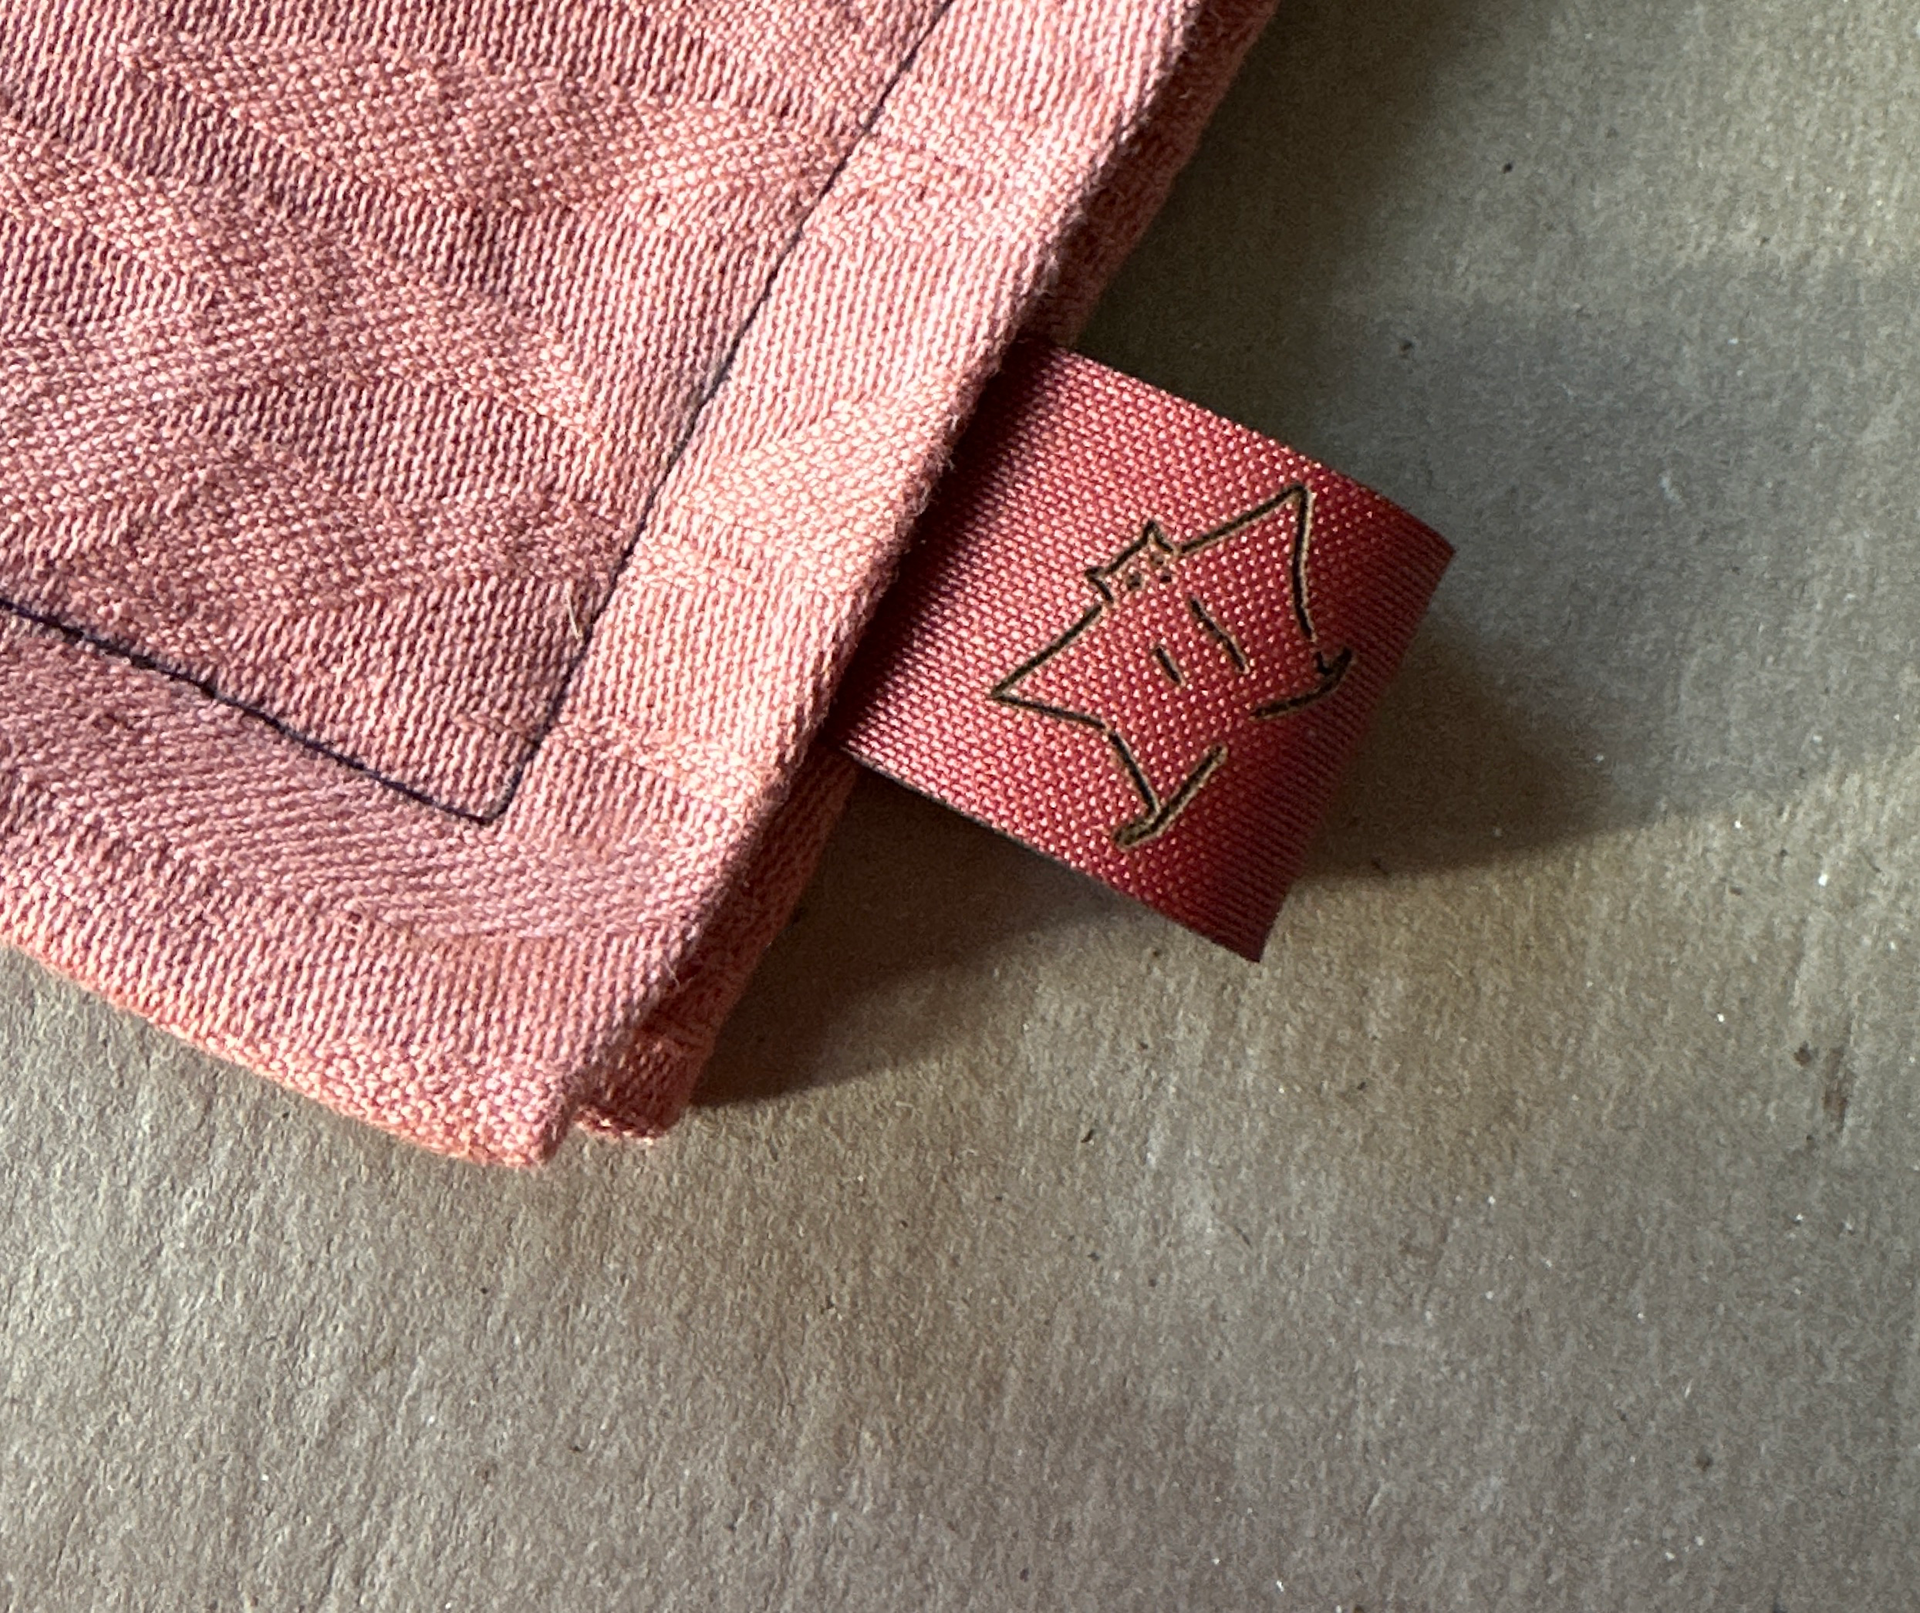
The bag is reminiscent of a flying squirrel, which is why we decided to call the bag "Risu" because it means "squirrel" in Japanese.


Tiny RISU tag
Video
Ben, my partner, was in charge of creating a promotional video for our bag. We used stop motion to capture because it was a fun and creative way to demonstrate its use. Additionally, this was the perfect opportunity to learn how to use stop motion since both of us were interested in it.
Winter Market Stall and Selling
Winter Market was held in front of the design building. For two hours we talked to potential costumers and we sold all of our bags except for one. Some questions and feedback we received was "Is the bag insulated?" "I would so use this for my rock climbing equipment if it was a bit bigger!" "I really want one since I eat on my bed all the time! This would prevent crumbs from getting everywhere!"


Reflection
For this assignment I challenged myself to push myself to learn new skills and to design a product that was innovative. Since I was relatively new at sewing that also presented another challenge. There are several issues with craft in the final bag. I think that is why we had some difficulty selling them. In the future, I would like to use more types of fabric and be more intentional with fabric choices. Additionally, the product needed some refinement such as sanding down and painting the 3D printed handles. This was an incredible experience and I will take all of what I learned into future projects.